🌐 Services in Kubernetes: A Deep Dive 🌍
Day34: 90DaysOfDevOps Challenge

Hey there! I am Deepak!! Passionate About Cloud & AWS☁️| DevOps ♾️ Technologies 👩🏻💻 And Skilled with Git 🔀 | Docker 🐳 | Kubernetes ☸ | Jenkins 🛠️
👏 Welcome to my blog!!
Introduction
Kubernetes is the powerhouse of container orchestration. One of the essential building blocks of Kubernetes is Services. In this blog, we'll unravel the magic of Kubernetes Services.💥🙌
🤔 What Problems Do Kubernetes Services Solve?
In Kubernetes, Pods are non-permanent resources - they can appear and disappear as needed. This is because Kubernetes constantly checks to make sure the cluster is running the desired number of replicas (copies) of your app. And Pods are created or destroyed to match this desired state.
If a Pod fails for some reason, no worries - Kubernetes will quickly create a new one to replace it. And if you want to update your app, Kubernetes can destroy old Pods and create new ones with the updated code. So the set of Pods running at one moment could be totally different from the set running a moment later.
But here's the thing - if you want to access your app, how do you keep track of which Pod to connect to with all these changing IP addresses of Pods?
Because every time the new IP address is assigned to a pod or newly created pod.
That's where Services come in. They provide an unchanging location for a group of Pods. So even though the Pods themselves are dynamic, the Services make sure you always have a central location to access your app.
The service object is a logical bridge between the pod and end users, which provides
Virtual IP (VP).The service allows users to connect to the containers running inside pods using
Virtual IP.
🌟Types of Kubernetes Services
Let's explore the different types of Kubernetes Services
ClusterIP Service
NodePort Service
LoadBalancer Service
🌐 ClusterIP Service
ClusterIP Services are used for communication between Pods within the same Kubernetes cluster.
The Service gets exposed on a static IP/virtual IP that's unique within the cluster. When you make a request to that IP, the Service takes care of redirecting traffic to one of the Pods it's associated with.
And if there's more than one Pod, the Service will automatically balance the traffic.
Note that ClusterIP Services are meant for Pod-to-Pod communication only. They aren't accessible from outside the cluster.
💡Example: ClusterIP Service
Create a
ClusterIP Servicedefinition for yourhttpdDeployment in a YAML file.# Defines to create Service type Object apiVersion: v1 kind: Service metadata: name: httpd-service namespace: httpd-namespace spec: ports: - port: 80 # Containers port exposed targetPort: 80 # Pods port selector: name: deployment # Apply this service to any pods which has the specific label "deployment" type: ClusterIP # Specifies the service type i.e ClusterIP or NodePortCreate a
Deploymentdefinition for yourNginxDeployment in a YAML file.apiVersion: apps/v1 kind: Deployment metadata: name: httpd-deployments namespace: httpd-namespace spec: replicas: 2 selector: # tells the controller which pods to watch/belong to matchLabels: name: deployment template: metadata: namespace: httpd-namespace name: httpd-pod labels: name: deployment spec: containers: - name: httpd-container image: httpd ports: - containerPort: 80Apply the ClusterIP Service definition to your K8s (Minikube) cluster using
the
kubectl apply -f cluster-ip-service.ymlcommand.Create the namespace if not created using
kubectl create namespace <namespace-name>command.Apply the Deployment definition to your K8s (Minikube) cluster using
the
kubectl apply -f cluster-ip-deployment.ymlcommand.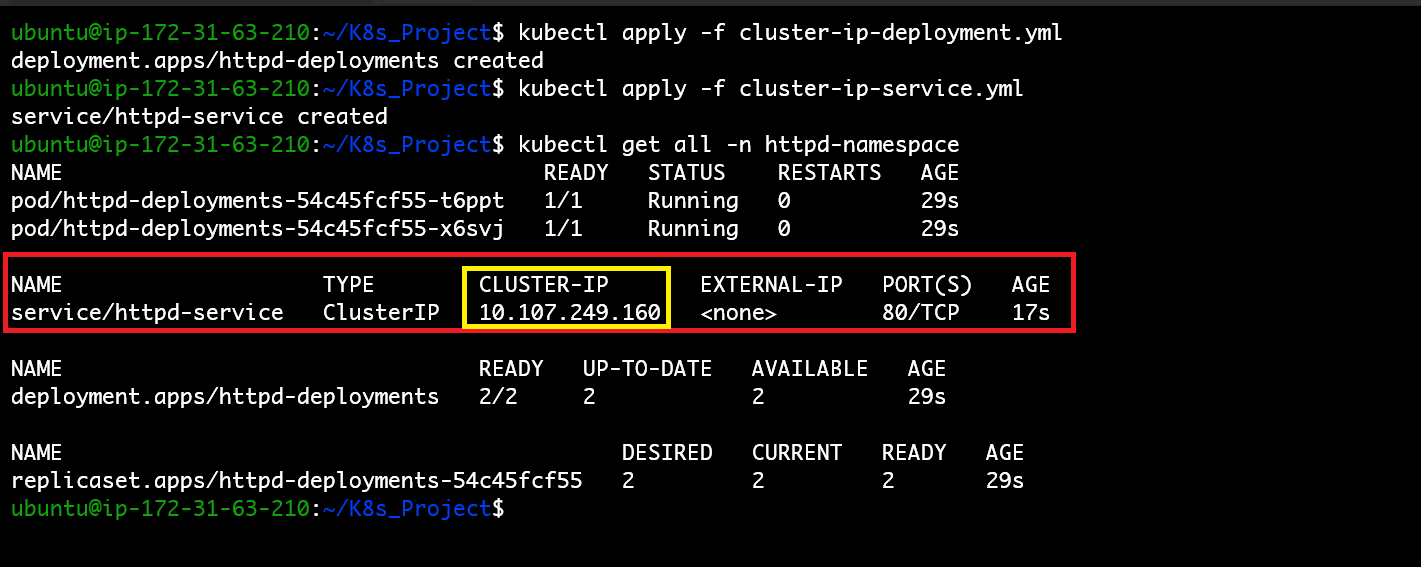
We can see here once the
serviceis created the and Virtual IP10.107.249.160is assigned to theclusterasCLUSTER-IPbyKube-proxy.Our
Deploymentand2 Podswere also created successfully.Verify that the ClusterIP Service is working by accessing the
httpdfrom thelogin to any of the pods using the command
kubectl exec -n <namespace> -it <pod_name> — /bin/bash.Copy the
Cluster IPand typecurl <cluster-ip>:80.If curl does not install after login into the pod.
use
apt install curl -y
Now delete the created pod and test the same things again and see what happens.
Once we have deleted the pod the new pod is created automatically because we have used
Deploymentit for creating the pod andReplica Setmaintaining theDesired state(1 which we have set in Deployment) of the pod and auto-healing.
Conclusion:Even if we delete the pod the new pod is created and the IP address of the pod also changed, and still, we are able to access the application using theK8s ClusterIP service.
🌐 NodePort Service
The NodePort Service is useful when you need to expose your application to external clients. This means all traffic that is coming from outside of the cluster.
When you create a NodePort Service, Kubernetes opens a port
(in the range of 30000 and 32767)on all of its worker nodes.Note that the same port number is used across all of them. All traffic incoming to the worker node's IP address, and that specific port, is redirected to a Pod linked with that Service.
You can contact the NodePort Service, from outside the cluster, by requesting :
<NodeIP>:<NodePort>.
💡 Example: NodePort Service Service
Create a
NodePort Servicedefinition for yourhttpdDeployment in a YAML file.Here we have to make some modifications- in
type, we have mentioned thetypesasNodePortand the Second thing is we also need to addnodePortinportssection.nodePort:Tells Kubernetes which port to"open"to theoutside worldon all of the worker nodes. This makes them accept incoming connections, from outside the cluster, on the port we chose here, 30003. If not specified Kubernetes will automatically assign a port(in the range of 30000 and 32767).# Defines to create Service type Object (in the range of 30000 and 32767) apiVersion: v1 kind: Service metadata: name: httpd-service namespace: httpd-namespace spec: ports: - port: 80 # Containers port exposed targetPort: 80 # Pods port nodePort: 30003 # "open" to the outside world selector: name: deployment # Apply this service to any pods which has the specific label "deployment" type: NodePort # Specifies the service type i.e ClusterIP or NodePortCreate a
Deploymentdefinition for yourhttpdDeployment in a YAML file. (The Deployment YAML file is the same one we have used in an earlier service).apiVersion: apps/v1 kind: Deployment metadata: name: httpd-deployments namespace: httpd-namespace spec: replicas: 1 selector: # tells the controller which pods to watch/belong to matchLabels: name: deployment template: metadata: namespace: httpd-namespace name: httpd-pod labels: name: deployment spec: containers: - name: httpd-container image: httpd ports: - containerPort: 80Apply the ClusterIP Service definition to your K8s (Minikube) cluster using
the
kubectl apply -f node-port-service.ymlcommand.Create the namespace if not created using
kubectl create namespace <namespace-name>command.Apply the Deployment definition to your K8s (Minikube) cluster using
the
kubectl apply -f node-port-deployment.ymlcommand.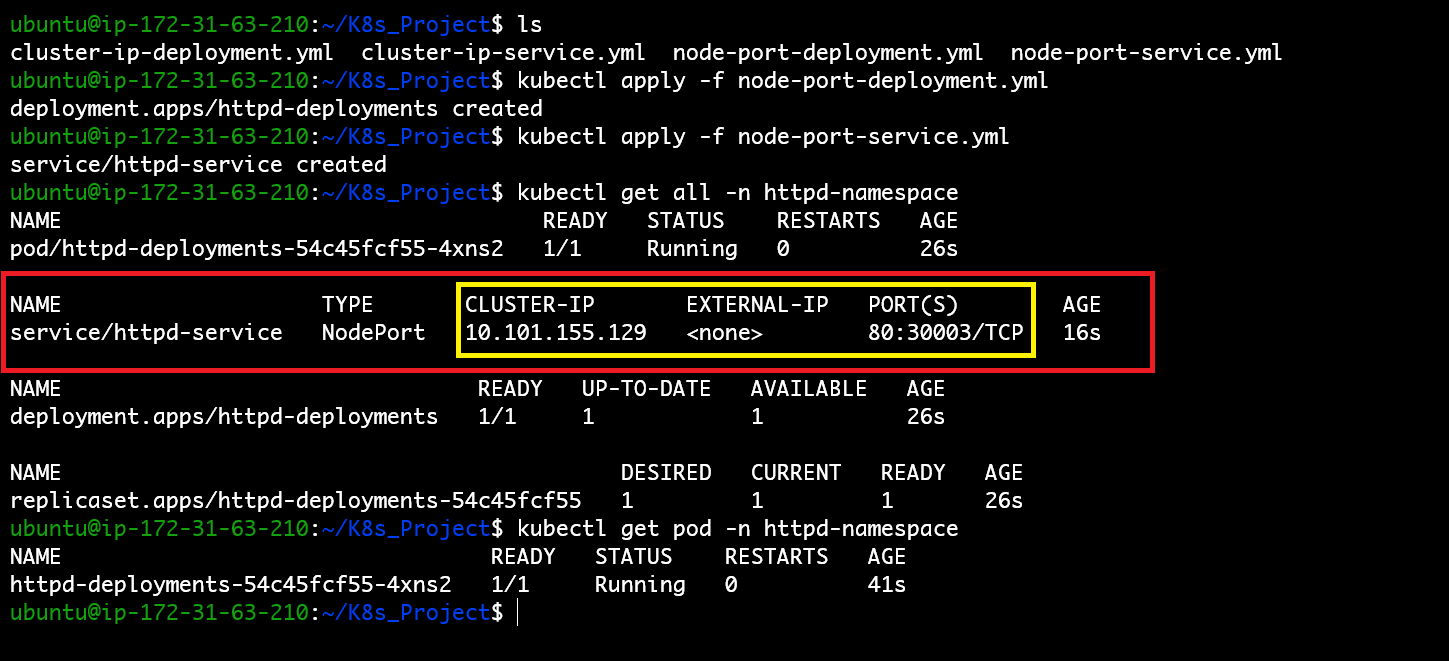
As we know once the
serviceis created the and Virtual IP10.101.155.129is assigned to theclusterasCLUSTER-IPbyKube-proxy.And the
PORTis also open30003to access the application outside the cluster.You can now access your application within a cluster by visiting the URL provided by Minikube:
minikube service <servicename> -n <namespace> created --url
To make your application accessible from the
Internet(browser), you'll need toExpose the Deployment and configure Port Forwarding.Why Port Forwarding?: While NodePort services expose your service to external traffic, you may also need to access the service directly from your local machine, especially during development, debugging, or testing. Port forwarding allows you to do just that.
Exposing a NodePort Service*:*
Exposing a NodePort service makes your application accessible from outside the Kubernetes cluster. NodePort services allocate a specific port on each node in the cluster, making it available for external access.
kubectl expose deployment <deployment-name> -n <namespace-name> --type=NodePortkubectl port-forward svc/<service-name> -n <namespace-name> <local-port>:<pod-port> --address 0.0.0.0 &Make sure the
NodePort(30003)is open in yourSecurity Groupof theEC2instance.
Now copy your EC2 instance Public IP address and enter it into the browser
<EC2 instance Public IP>:<your-forwared-port>
🌐 LoadBalancer Service
A LoadBalancer Service is another way you can expose your application to external clients. However, it only works when you're using Kubernetes on a cloud platform(AWS, GCP, Azure ....) that supports this Service type.
The LoadBalancer Service detects the cloud computing platform on which the cluster is running and creates an appropriate load balancer in the cloud provider’s infrastructure.
💡 Example: LoadBalancer Service
Create a
LoadBalancer Servicedefinition for yourhttpdDeployment in a YAML file.Here we have to make some modifications- in
type, we have mentioned thetypesasLoadBalancer# Defines to create Service type Object apiVersion: v1 kind: Service metadata: name: httpd-service namespace: httpd-namespace spec: ports: - port: 80 # Containers port exposed targetPort: 80 # Pods port nodePort: 30008 # "open" to the outside world selector: name: deployment # Apply this service to any pods which has the specific label "deployment" type: LoadBalancer # Specifies the service type i.e ClusterIP or NodePortCreate a
Deploymentdefinition for yourhttpdDeployment in a YAML file. (The Deployment YAML file is the same one we have used in an earlier service)apiVersion: apps/v1 kind: Deployment metadata: name: httpd-deployments namespace: httpd-namespace spec: replicas: 2 selector: # tells the controller which pods to watch/belong to matchLabels: name: deployment template: metadata: namespace: httpd-namespace name: httpd-pod labels: name: deployment spec: containers: - name: httpd-container image: httpd ports: - containerPort: 80Apply the ClusterIP Service definition to your K8s (Minikube) cluster using
the
kubectl apply -f load-balancer-service.ymlcommand.Create the namespace if not created using
kubectl create namespace <namespace-name>command.Apply the Deployment definition to your K8s (Minikube) cluster using
the
kubectl apply -f load-balancer-deployment.ymlcommand.
You can see here the
ClusterIPservice also created on top of thatNodePortservice also created and on top of thatLoadBalancerservice was also created and theEXTERNAL-IPis pending.The type is
LoadBalancer, but itsEXTERNAL-IPstatus isPendingsince Minikube does not have a service with the LoadBalancer type, because it must be created at the infrastructure level – AWS, GCE, Azure, and then Kubernetes receives an IP or URL from them to route requests to this load balancer.
📚 Takeaways
ClusterIPfor internal communication between pods.NodePortfor exposing applications externally during development.LoadBalancerfor public-facing, production-grade services.
In Kubernetes, Services are the linchpin of networking. They ensure seamless communication within your cluster and beyond. By choosing the right type of Service, you can connect your applications reliably and securely, helping your containerized journey take flight.
Thank you🙏🙏... for taking the time to read this blog. I hope you found the information helpful and insightful. So please keep yourself updated with my latest insights and articles on DevOps 🚀 by following me on
So, Stay in the loop and stay ahead in the world of DevOps!
Happy Learning !... Keep Learning ! 😊


