☸️Kubernetes Deployment📦: Unveiling the Power of Orchestration 🚀
Day 32 Task: 90DaysOfDevOps Challenge

Hey there! I am Deepak!! Passionate About Cloud & AWS☁️| DevOps ♾️ Technologies 👩🏻💻 And Skilled with Git 🔀 | Docker 🐳 | Kubernetes ☸ | Jenkins 🛠️
👏 Welcome to my blog!!
🚢Introduction
Welcome to the exciting world of Kubernetes Deployments! 🌟 In this blog, we'll explore the incredible features of Kubernetes Deployments and how they simplify application management in Kubernetes clusters. Get ready for a journey into the heart of container orchestration! ☸️🐳
A Deployment provides a configuration for updates for Pods and ReplicaSets.
You describe a desired state in a Deployment, and the Deployment Controller changes the actual state to the desired state at a controlled rate. You can define Deployments to create new replicas for scaling or to remove existing Deployments and adopt all their resources with new Deployments.
🛠Feature Of Kubernetes Deployment
Rolling Updates 🔄
Feature: Deployments allow you to perform rolling updates seamlessly, ensuring zero downtime during application updates.
Example: Suppose you have an app deployed with version 1.0. You want to update it to version 2.0. Kubernetes will gradually replace old pods with new ones until all pods are running version 2.0.
Rollback Capability ↩️
Feature: In case an update goes awry, Deployments enable you to easily roll back to the previous stable version.
Example: If version 2.0 experiences issues, you can instantly revert to version 1.0 with a simple command.
Replication and Scaling 🔄
Feature: Deployments ensure that a specified number of replica pods are running at all times.
Example: You can define that your app should always have five replicas. If a pod fails, a new one is automatically created to maintain this count.
Self-Healing 🩺
Feature: Deployments constantly monitor the state of your pods. If any pod becomes unhealthy or crashes, Deployments automatically replace it.
Example: If one of your pods fails due to a memory issue, a new healthy pod is created to replace it without manual intervention.
Version Control 📚
Feature: Deployments maintain a history of all previously deployed versions, making it easy to track changes and roll back when necessary.
Example: You can inspect the history of deployments and see when each version was rolled out.
Scalability 📈
Feature: Deployments support automatic scaling based on resource utilization or custom metrics.
Example: If your app experiences high traffic, Kubernetes can automatically increase the number of pods to handle the load.
Resource Management 💼
Feature: Deployments allow you to define resource requests and limits for your pods, optimizing resource utilization.
Example: You can specify that each pod should have a minimum of 256MB of memory and a maximum of 1 CPU core.
Labels and Selectors 🏷️
Feature: Deployments use labels to select and manage pods. This allows for easy grouping and organization of pods.
Example: You can label pods with attributes like "app=web" and "environment=production," and then use selectors to manage them accordingly.
Zero-Downtime Deployments 🏭
Feature: Deployments ensure that new pods are fully ready and healthy before old pods are terminated, guaranteeing zero downtime.
Example: When rolling out an update, the old version is only scaled down when the new version is verified to be running correctly.
📦Create Deployment
Here we will create one Deployment file to deploy a sample todo-app on K8s using the "Auto-healing" and "Auto-Scaling" features.
We have learned how to install and configure the Minikube in our system in the previous blog.
To install and configure Minikube please check out: https://deepakcloud22.hashnode.dev/minikube-installation-launching-your-first-kubernetes-cluster-with-nginx-running
📜Sample Deployment YAML file:
apiVersion: apps/v1 kind: Deployment metadata: name: nginx-deployment labels: app: nginx spec: replicas: 3 selector: matchLabels: app: nginx template: metadata: labels: app: nginx spec: containers: - name: nginx image: nginx:1.14.2 ports: - containerPort: 80📝Explanation Of Deployment File:
apiVersion: apps/v1:These lines specify that we are defining a Kubernetes Deployment in theapps/v1API version. Deployments are used to manage the desired state of replicated applications.kind: Deployment: These lines specify that we are creating the Deployment resource of the Kubernetes.metadata: This section contains metadata about the Deployment.name: nginx-deployment: The name of the Deployment is set to "nginx-deployment."labels: Labels are key-value pairs used to identify and group resources. Here, we label this Deployment with "app: nginx."
spec: This is the specification for the Deployment, defining its desired state.replicas: 3: This field specifies that we want to maintain three replicas (pods) of the application.selector: The selector is used to match pods that belong to this Deployment.matchLabels: It specifies that pods should be selected based on the label "app: nginx."
template: This section defines the pod template used by the Deployment. All pods created by this Deployment will have the same configuration.metadata: Similarly, this metadata section contains labels for pods created by the template.labels: Pods created by this template are labeled with "app: nginx."
spec: This is the specification for the pod template.containers: Here, we define the containers to run within the pod. In this case, there is one container. you can define multiple containers also.name: nginx: The name of the container is set to "nginx."image: nginx:1.14.2: The Docker image to use for this container is "nginx:1.14.2," which is a specific version of the official Nginx Docker image from Docker Hub.ports: It specifies the port(s) to expose in the container. In this case, we expose port 80, which is commonly used for web traffic.
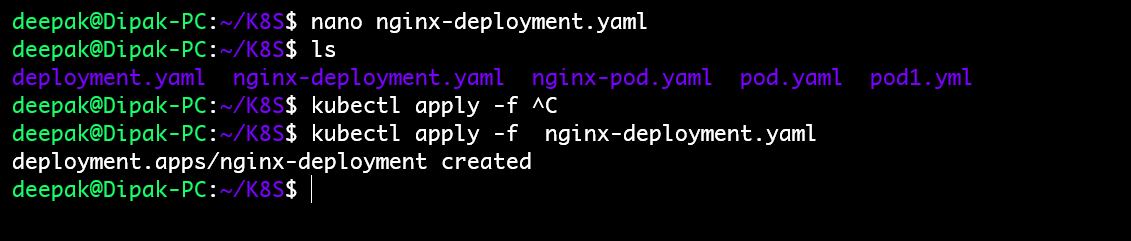
✍🏻Apply Deployment File
To create the deployment we have to use the kubectl command which will create the deployment,pod and the replica set to 3 of the application.
kubectl apply -f <deployment-yaml-filename>
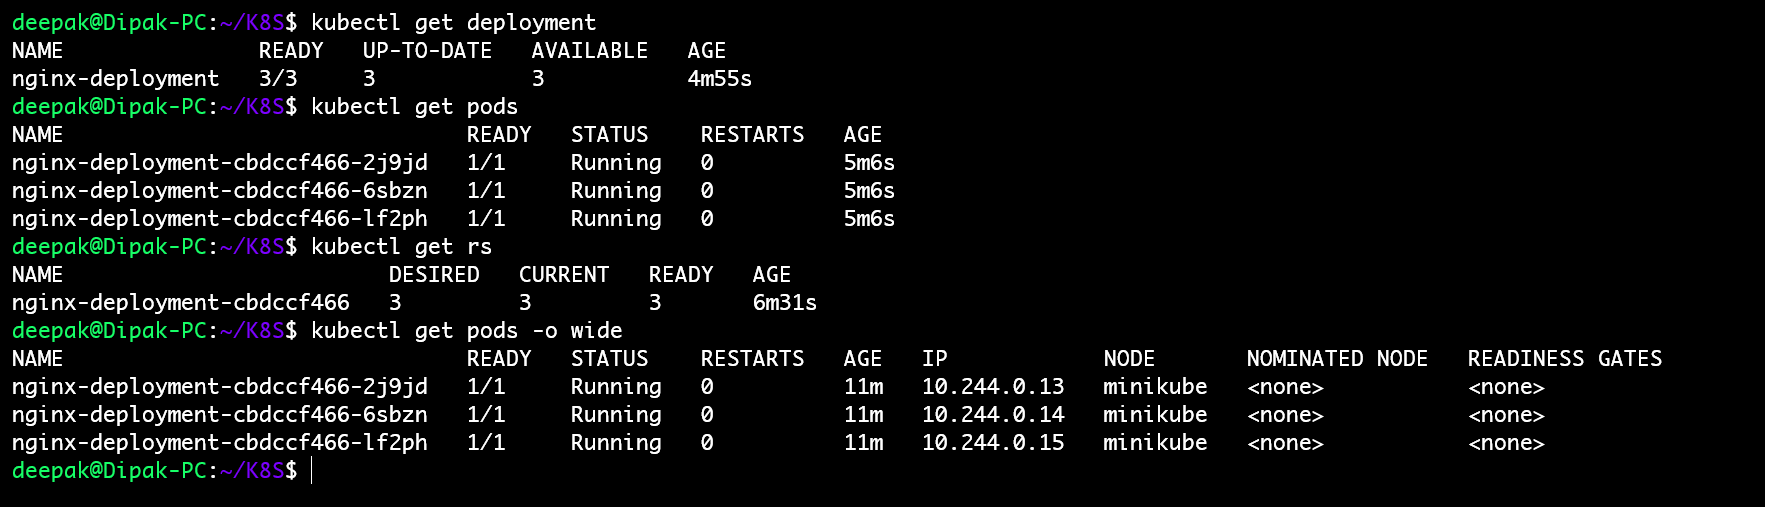
👩🏻💻Verify the Deployment, Pod, and Replica-Set
#To verify the deployment
kubectl get deployment or deploy
#To verify the pod
kubectl get pods
#To verify the replica set
kubectl get rs
#To get some more info about pods
kubectl get pods -o wide
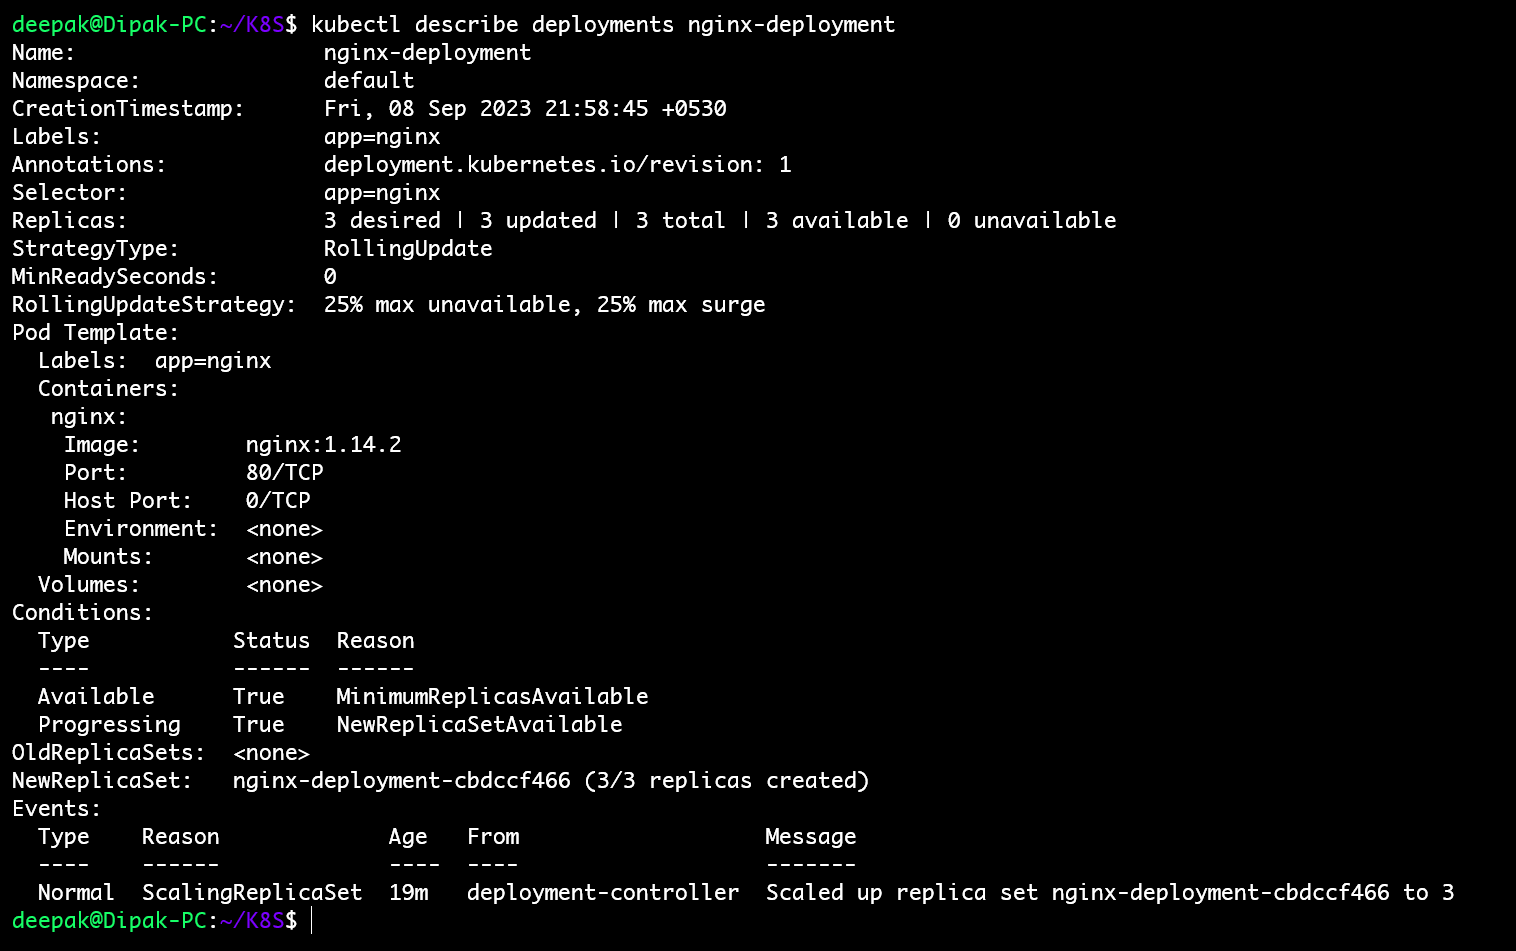
#Get details of your Deployment
kubectl describe deployments <deployment-name>
✅Validate the functionality of the auto-healing feature
To validate the auto-healing we will delete one of the pods here, Then the magic happens the deployment automatically creates the pod for you which means it will maintain its desire state(replicas)which is 3 in our case.
To delete the pod use the kubectl command.
kubectl delete pod <pod-name>
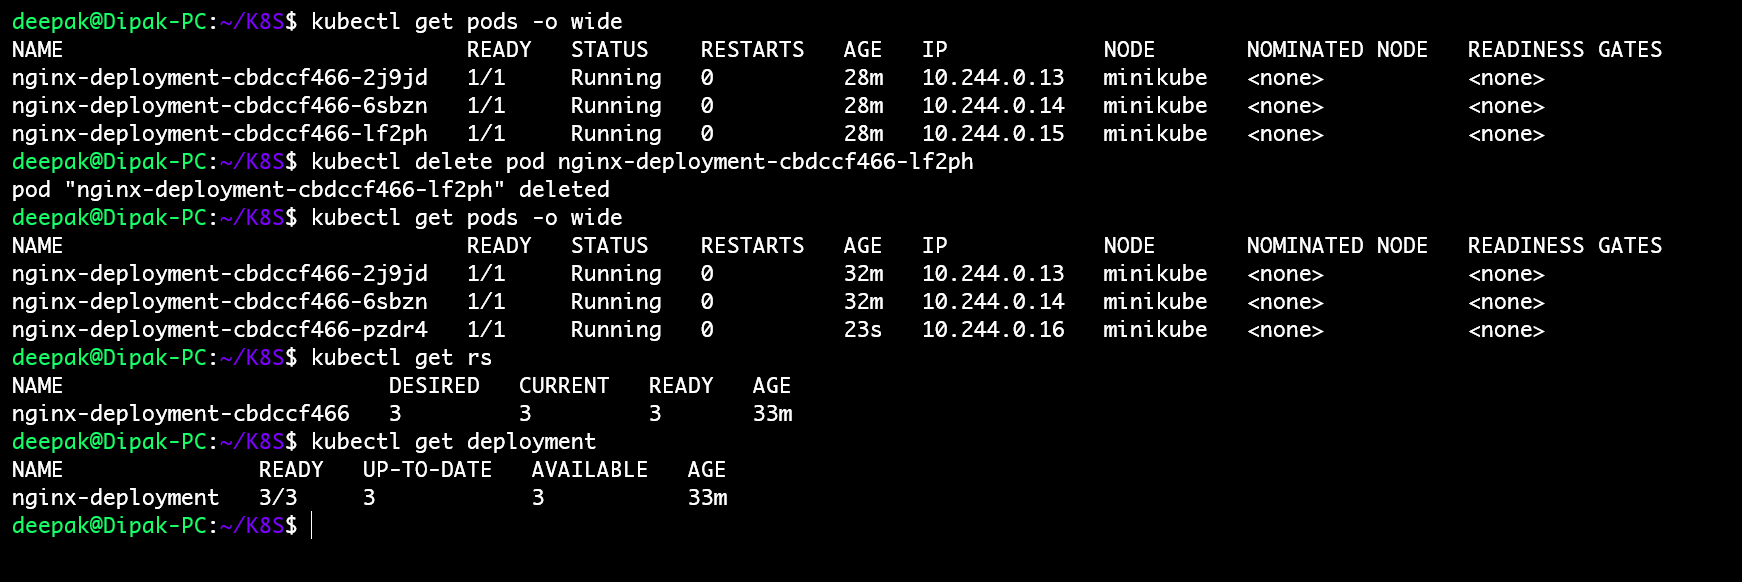
You can see here I have deleted one pod but the deployment has maintained its stare to 3 pods.
So this is how Kubernetes provides us the auto-healing capabilities which ensure that our application is up and running continuously.
📊Scaling a Deployment
You can set the desired state of the replicas and scale a Deployment by using the following command.
kubectl scale deployment/<deployment-name> --replicas=<number-of-replicas>
You can also scale the replicas in deployment.yaml file instead of scaling using the command.
After updating the deployment.yaml file you need to reapply the deployment.yaml file.
apiVersion: apps/v1
kind: Deployment
metadata:
  name: nginx-deployment
  labels:
    app: nginx
spec:
  replicas: 5
  selector:
    matchLabels:
      app: nginx
  template:
    metadata:
      labels:
        app: nginx
    spec:
      containers:
      - name: nginx
        image: nginx:1.14.2
        ports:
        - containerPort: 80
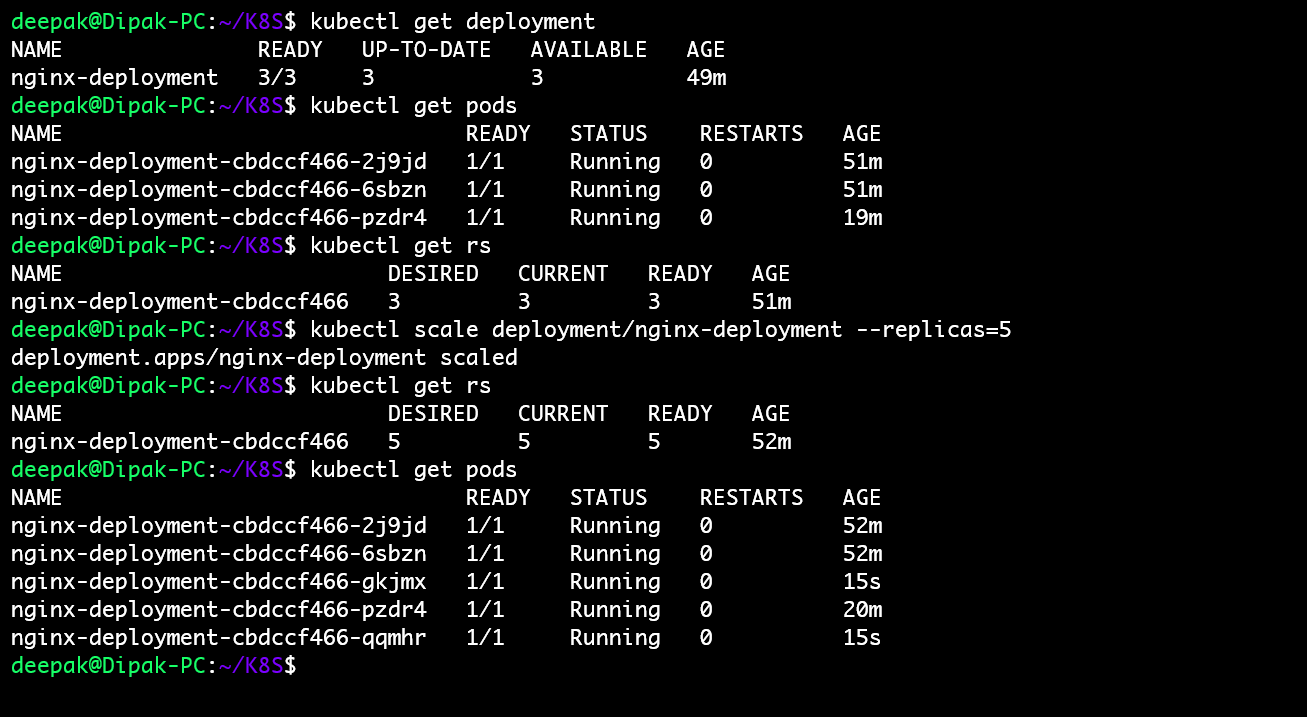
Here we will scale our replicas using the command.
After executing the above command you can see the out is deployment.apps/nginx-deployment scaled it means we have successfully scaled the replicas to 5 earlier it was 3.
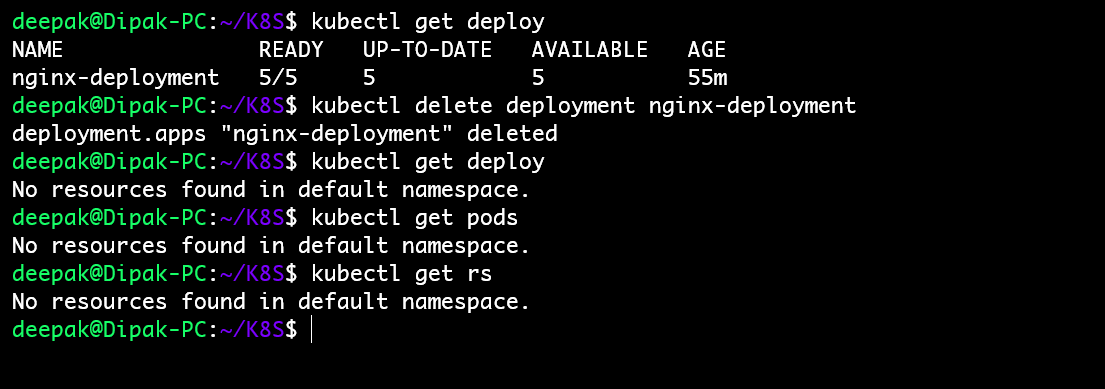
And finally, if you want to delete the deployment use the command.
kubectl delete deployment <deployment-name>
Once you delete the deployment and then the associated pods, the replica set will also be deleted.
📝Conclusion
In conclusion, Kubernetes Deployments are your go-to tool for managing and scaling containerized applications
You can confidently orchestrate your workloads, automate scaling, and ensure high availability
Thank you🙏🙏... for taking the time to read this blog. I hope you found the information helpful and insightful. So please keep yourself updated with my latest insights and articles on DevOps 🚀 by following me on
So, Stay in the loop and stay ahead in the world of DevOps!
Happy Learning !... Keep Learning ! 😊


