🧛♂️ Jenkins Declarative Pipeline with - Docker,🐳 GitHub,🔀 Webhook🔗

Hey there! I am Deepak!! Passionate About Cloud & AWS☁️| DevOps ♾️ Technologies 👩🏻💻 And Skilled with Git 🔀 | Docker 🐳 | Kubernetes ☸ | Jenkins 🛠️
👏 Welcome to my blog!!
Day 27 Task Of 90DaysOfDevOps Challenge
🎆Introduction
As of now, we are familiar with the Jenkins Declarative Pipeline Also, we are pretty familiar with Docker and Git, GitHub .
In this blog, we are deep dive into the Integration of Docker, GitHub , Webhook with Jenkins and we will take our skills to the next level.
🧛♂️🐳Create Jenkins Declarative Pipeline with - Docker and GitHub, Webhook🔗🔀
In this section, we are going to create a Jenkins Declarative Pipeline with Docker to host our application in a Docker container and GitHub to get the application code from the GitHub repository.
🔑Prerequisite
Make sure the following tools are installed and running in your system. Here we require the following tools...
🧛♂️Jenkins: To create the Jenkins Declarative Pipeline. Check out the link to install Jenkins. https://deepakcloud22.hashnode.dev/day-22-getting-started-with-jenkins
🐳Docker: Run the docker container to host our application. Check out the link to install docker https://deepakcloud22.hashnode.dev/day-16-task-docker-for-devops-engineers-part-1
🏢Docker Hub : To push the Docker image into the Docker Hub repository. Check out to create the Docker-Hub account https://docs.docker.com/docker-id/
🏢Git/GitHub Repo: To get the application code from the GitHub https://www.linkedin.com/pulse/day-8-task-basic-git-github-devops-engineers-deepak-patil/
📝Application Code: We will use the below application code you can clone the code or fork this repository https://github.com/Dips-1991/django-notes-app.git
⏭️Create The Pipeline
First, we will create the Pipeline. As we have installed Jenkins in our system.
Navigate to the Jenkins home page and
clickonNew Item.Enter
nameof the job.Select the
Pipelineas a project and click onOk.
Enter the
Description.Select the
GitHub projectAs we know we are integrating GitHub with Jenkins and adding the GitHub repo URL to theProject urlAs we know our application code is present on GitHub.
🔧Configure The Pipeline
Now, come to our main task here we will write the Ddeclerative pipeline Groovy syntax code.
🧬Clone Stage
Pipeline section:In theDefinitionselect thePipeline scriptfrom the drop-down.
🛠️Build Stage
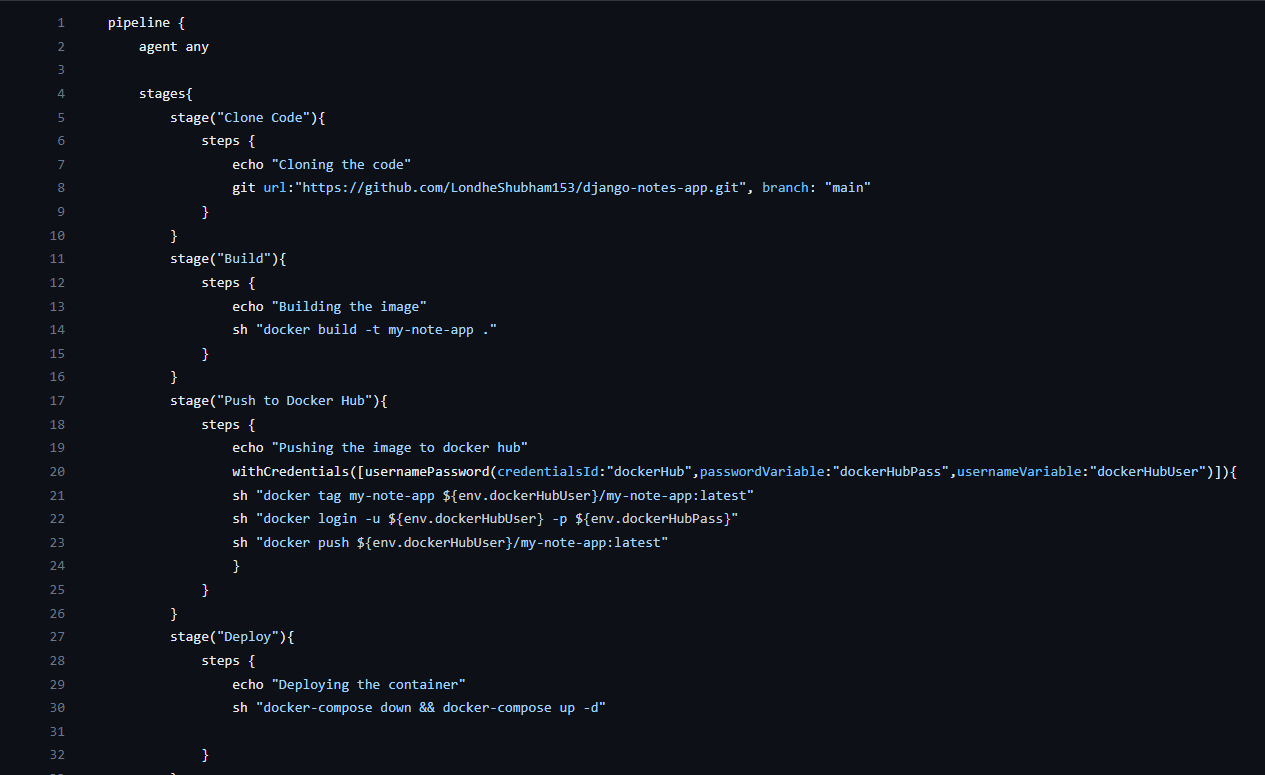
Script section:Understagesin the firstclonestagewe are cloning the code. To clone the code we have to use theGitHub URLand theBranch Namewhere our code is present.git url:"<github-repo-url>,<branch-name>"In the second
Buildstagewe are building the docker image using the Dockerfile. Here we have to useGroovy syntaxto run the docker command with the help ofsh.sh "docker build -t Django-app-image ."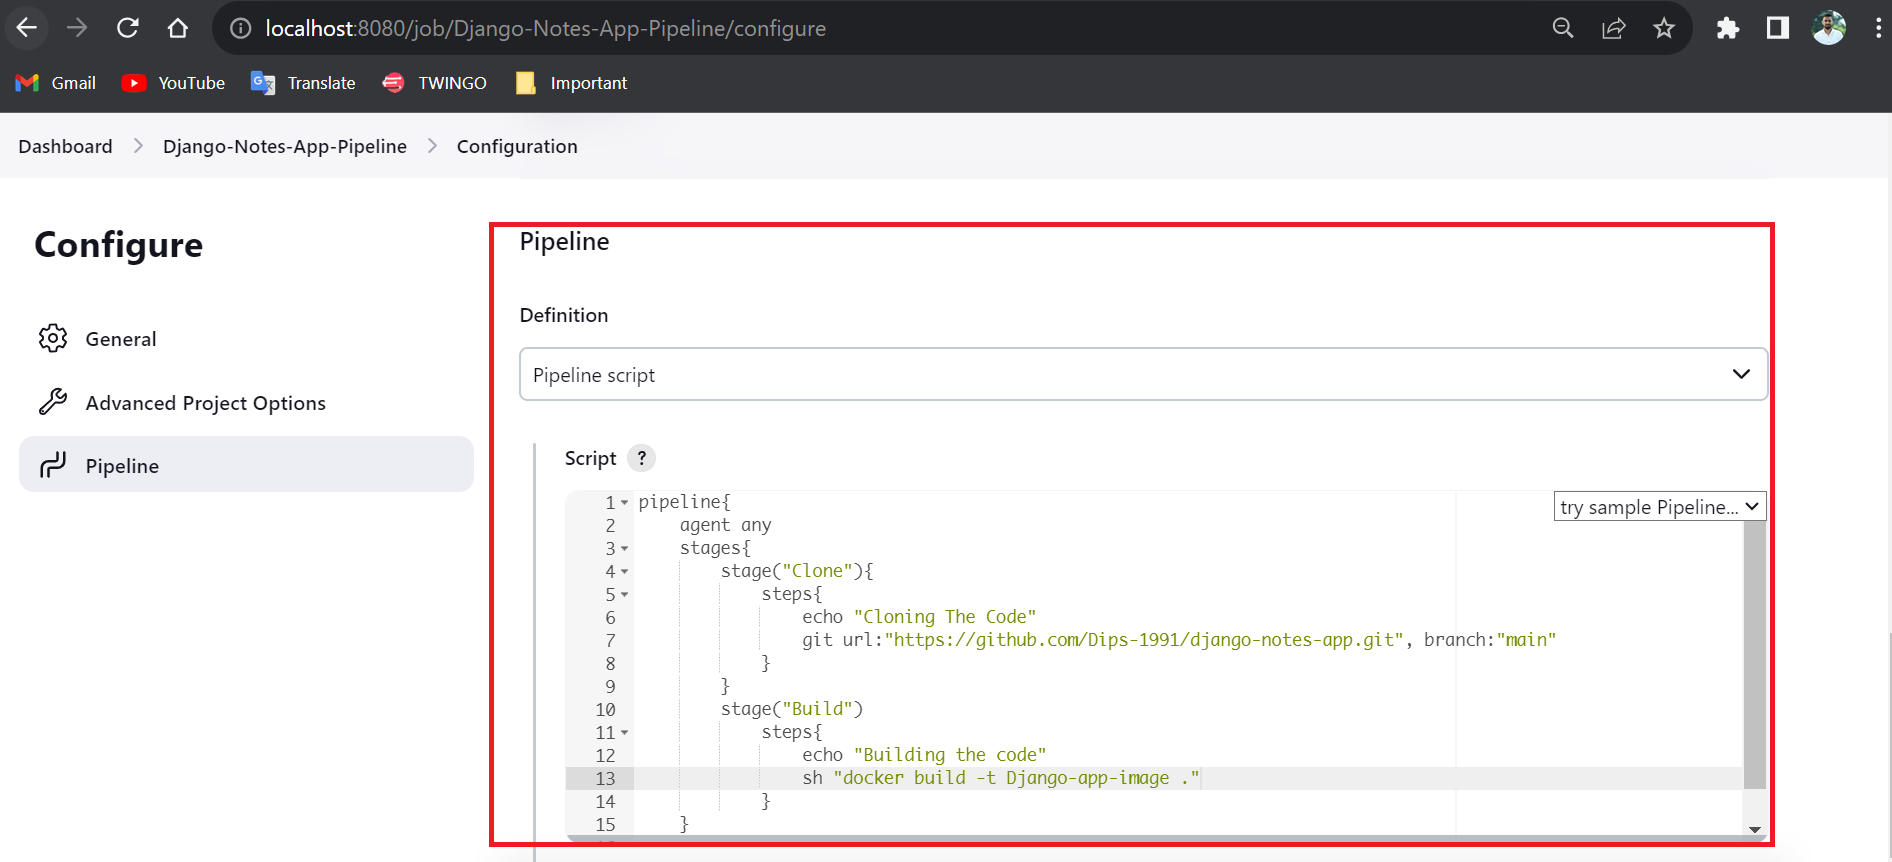
🚀Push Stage &Configuring The DockerHub Credentials
In the this
stage, we are pushing the image to DockerHub. For that First, we will save our credentials in Jenkins and we are associate them with theID.As we are aware that exposing the credentials is how dangerous so, we are using here the Jenkins environment variable.
Navigate to the
Manage jenkins --> Security --> CredentialsClick on the
Systemunder theStores scoped to Jenkins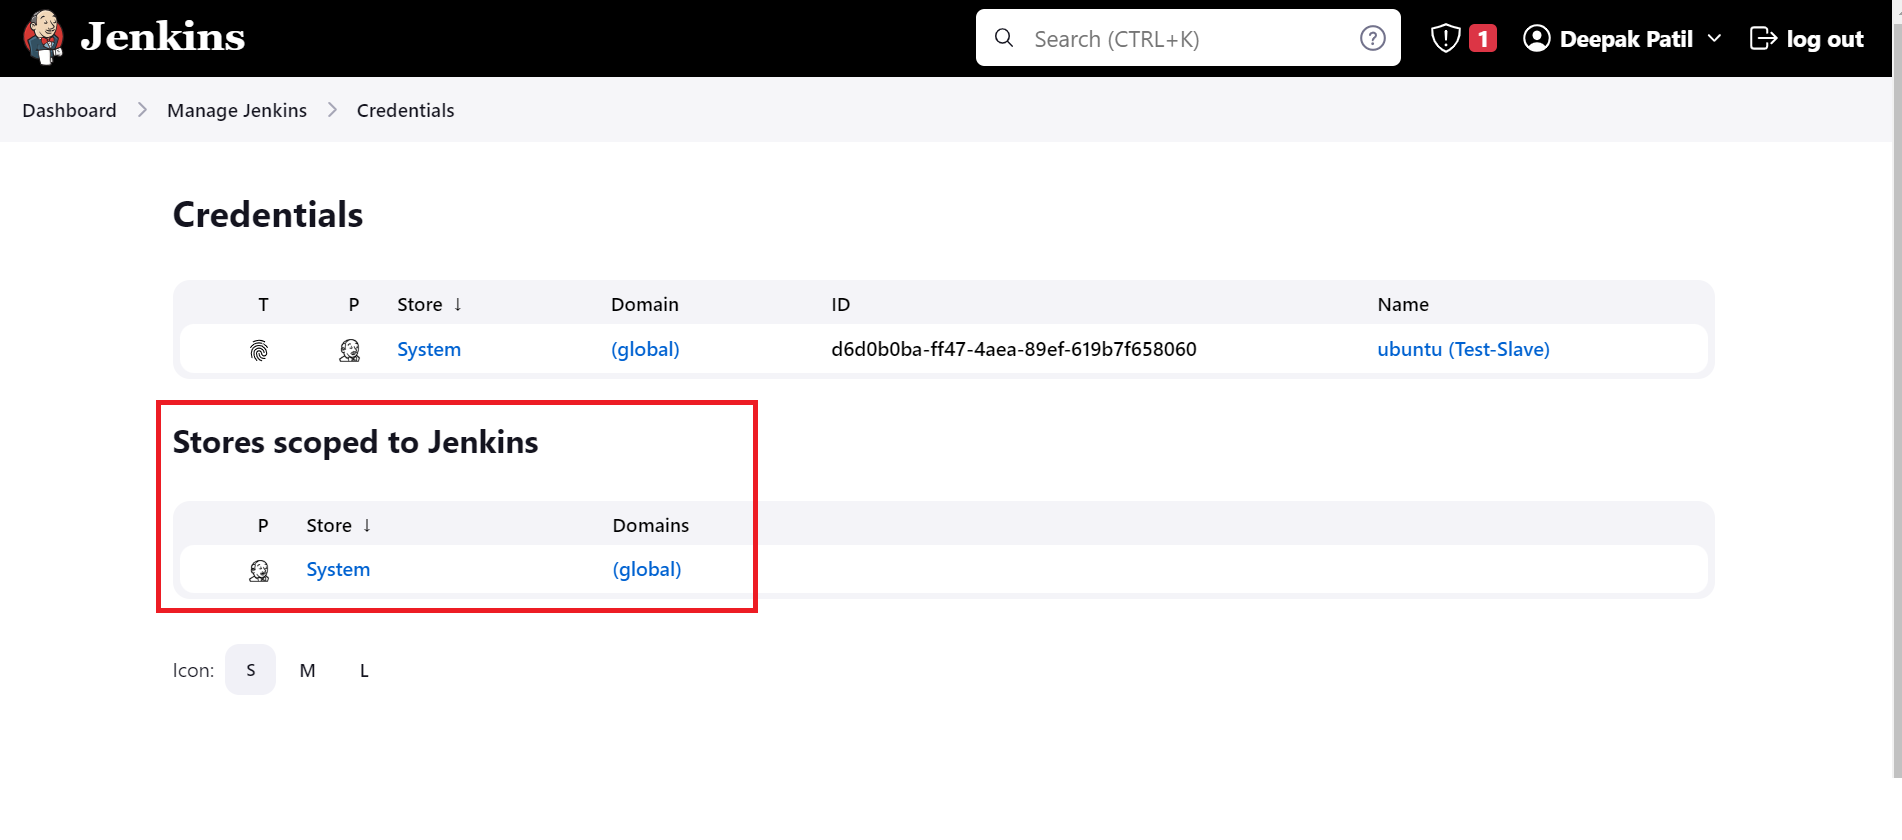
Once, you click on the System you will navigate to the next page where you have to click on
Global credentials (unrestricted).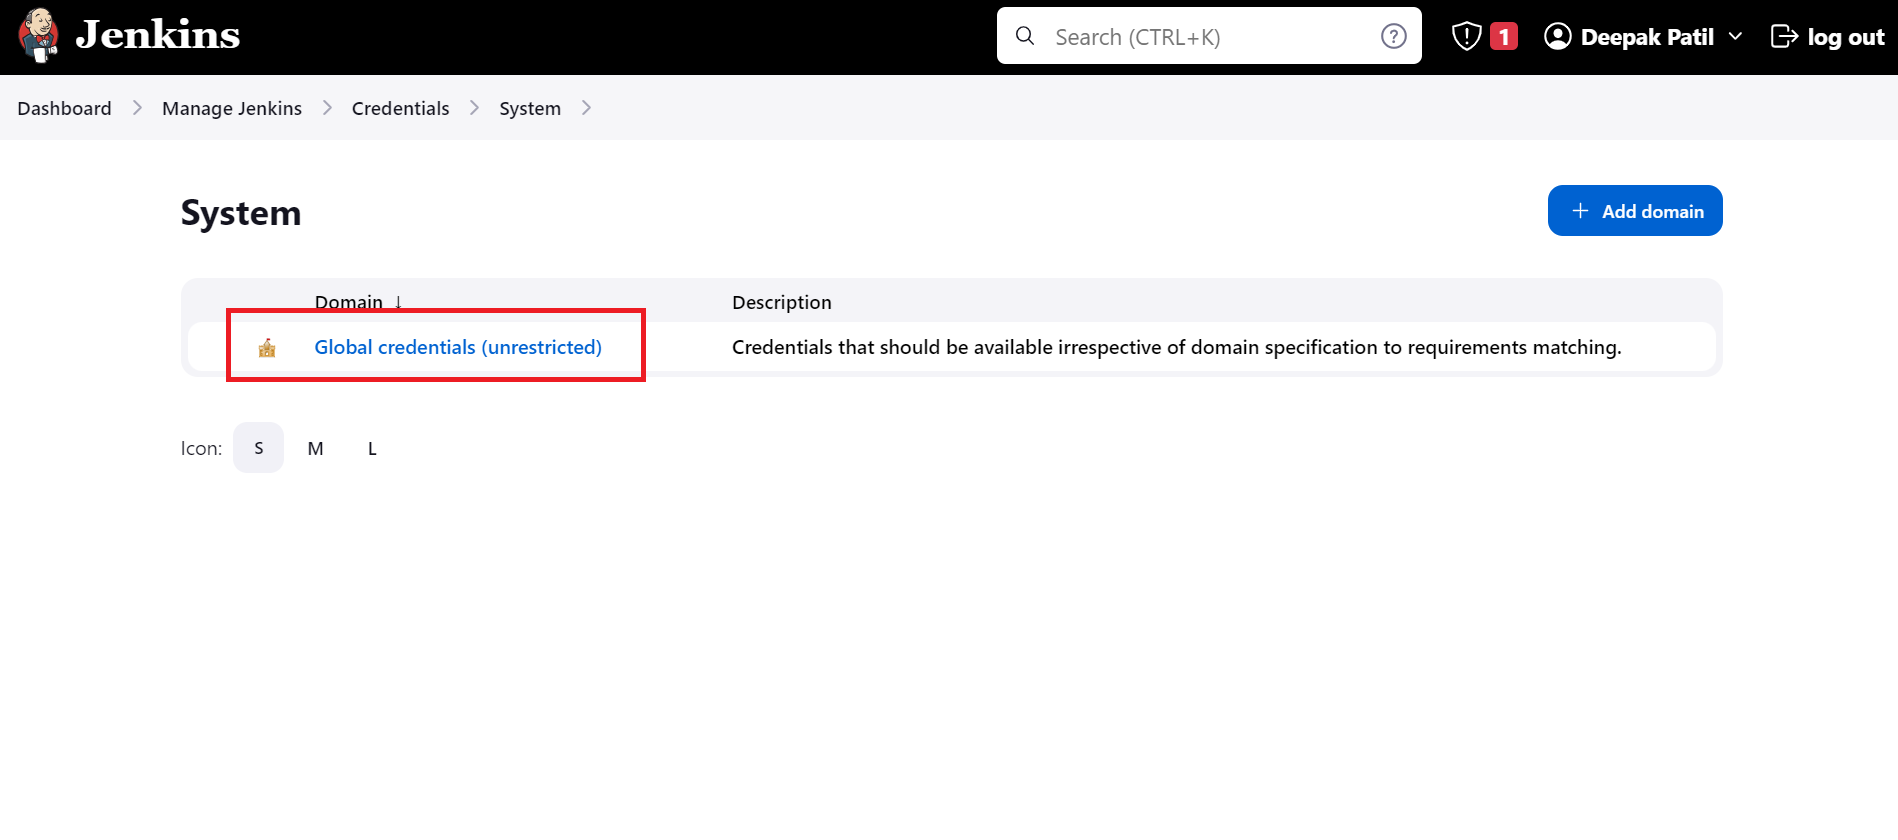
Once you click you will navigate to the next page click on
Add credentials.
Once, you click on
Add credentials.You will navigate to the next page where we will store ourDockerHub credentials.Here in
KindselectUsername with passwordfrom the dropdown. As we are using DockerHub credentials.Keep
Scopeas it is.In the
Usernameadd theDockerHub Username.In the Password add the
DockerHub Password.Keep
Treat username as secretuncheck.Enter the
ID (credentials are associate with ID)name at your convenience. ThenIDWe will use in our code to fetch the username and password.Click on Create.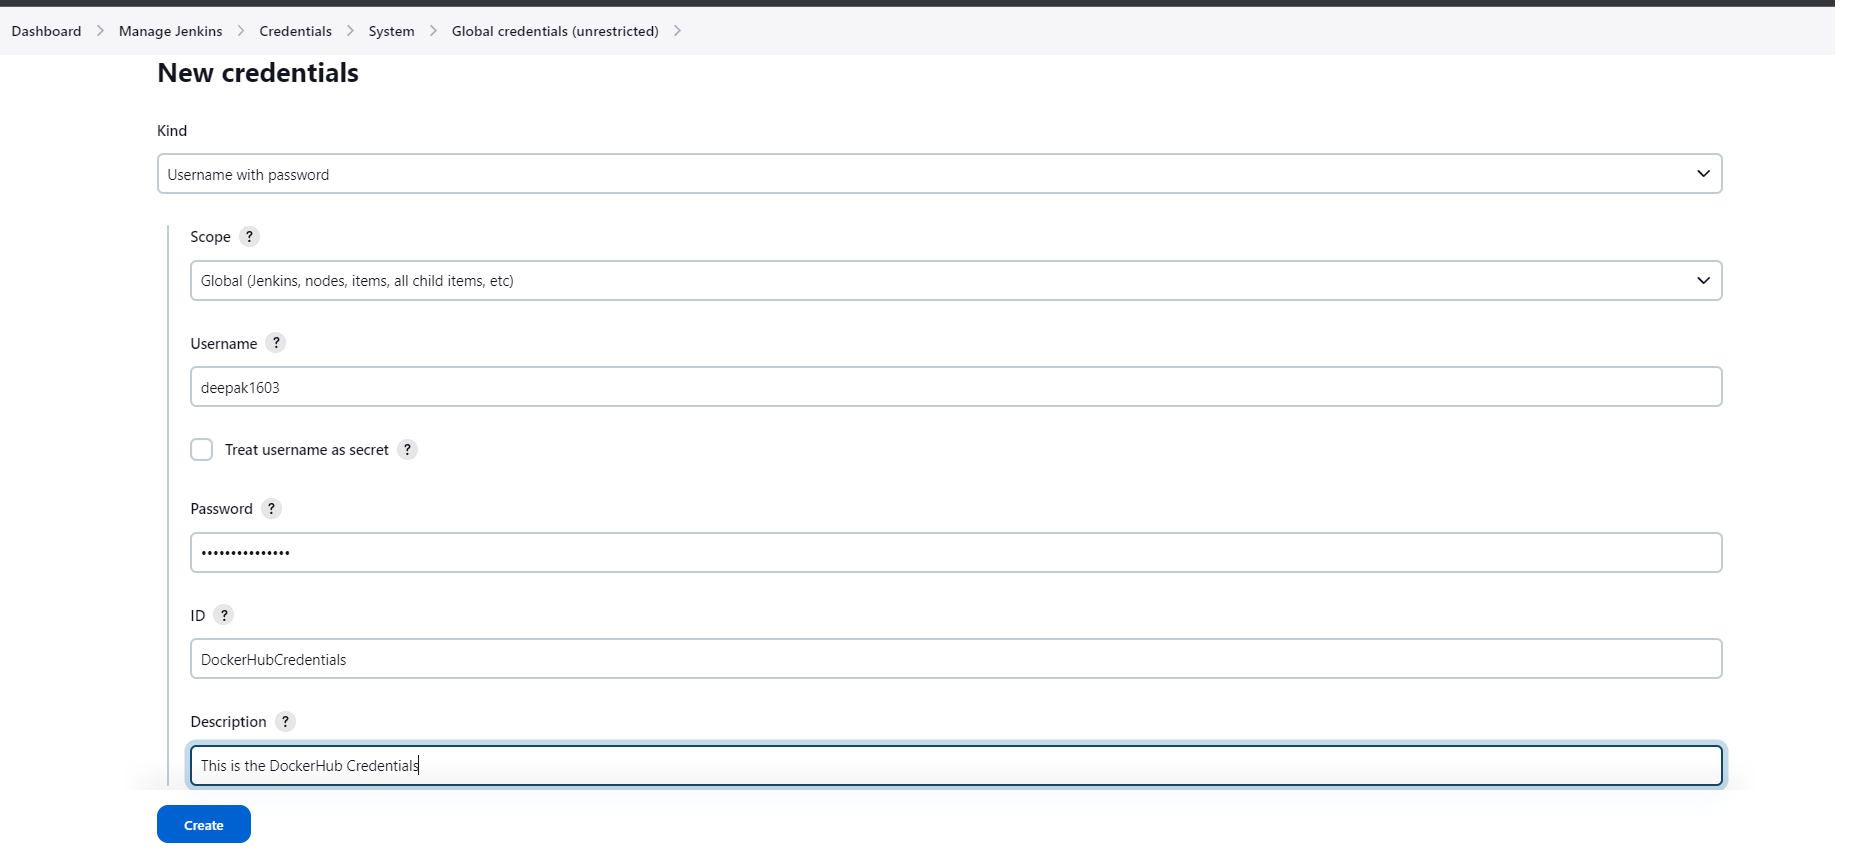
Now you will see the credentials are added.
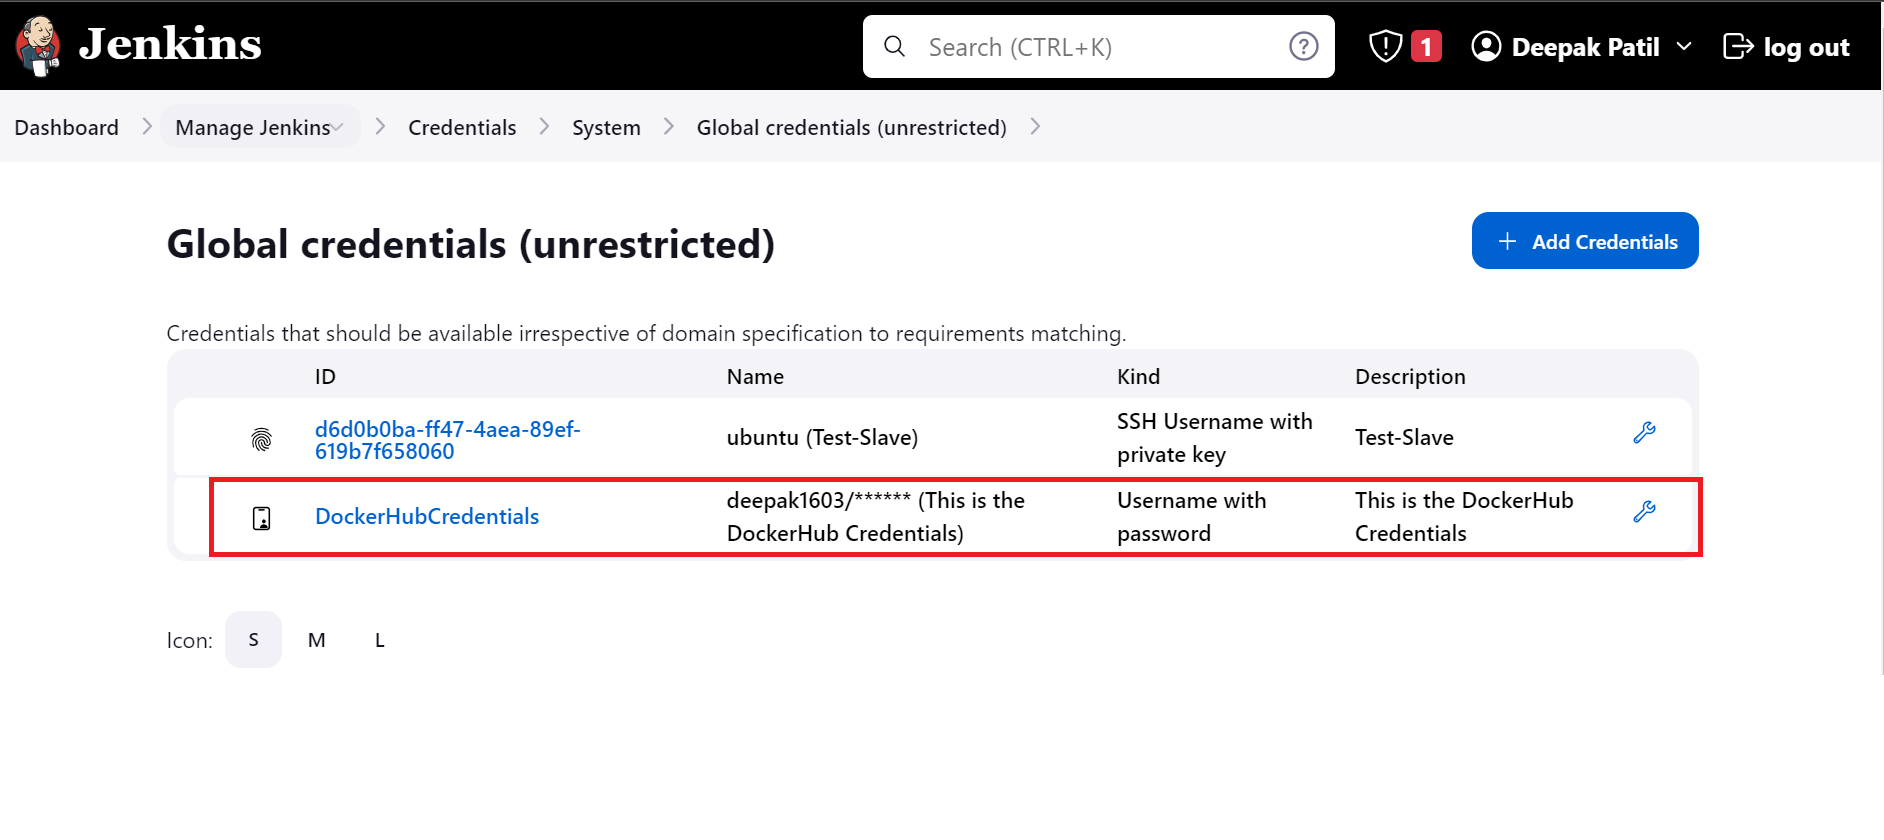
In the
Push ImagestageWe will push the image to DockerHub with the help ofwithCredentialsfunction and will pass thecredentiasId,usernameVariable,passwordVariableto the"usernamePassword"function.withCredentials([usernamePassword(credentiasId:"<your-credentials ID>",usernameVariable:"<any-name>",passwordVariable:"<any-name>")])In the next command, we have to tag our created image with the DockerHub username.
sh "docker tag <image-name> $env.<usernameVariable>/<new-image-name:<tag>>"In the next command, we will
loginto the DockerHubsh "docker login -u ${env.dockerUsername} -p ${env.dockerPassword}".In the next command, we will push the image into the DockerHub.
sh "docker push $env.<usernameVariable>/<new-image-name:<tag>>"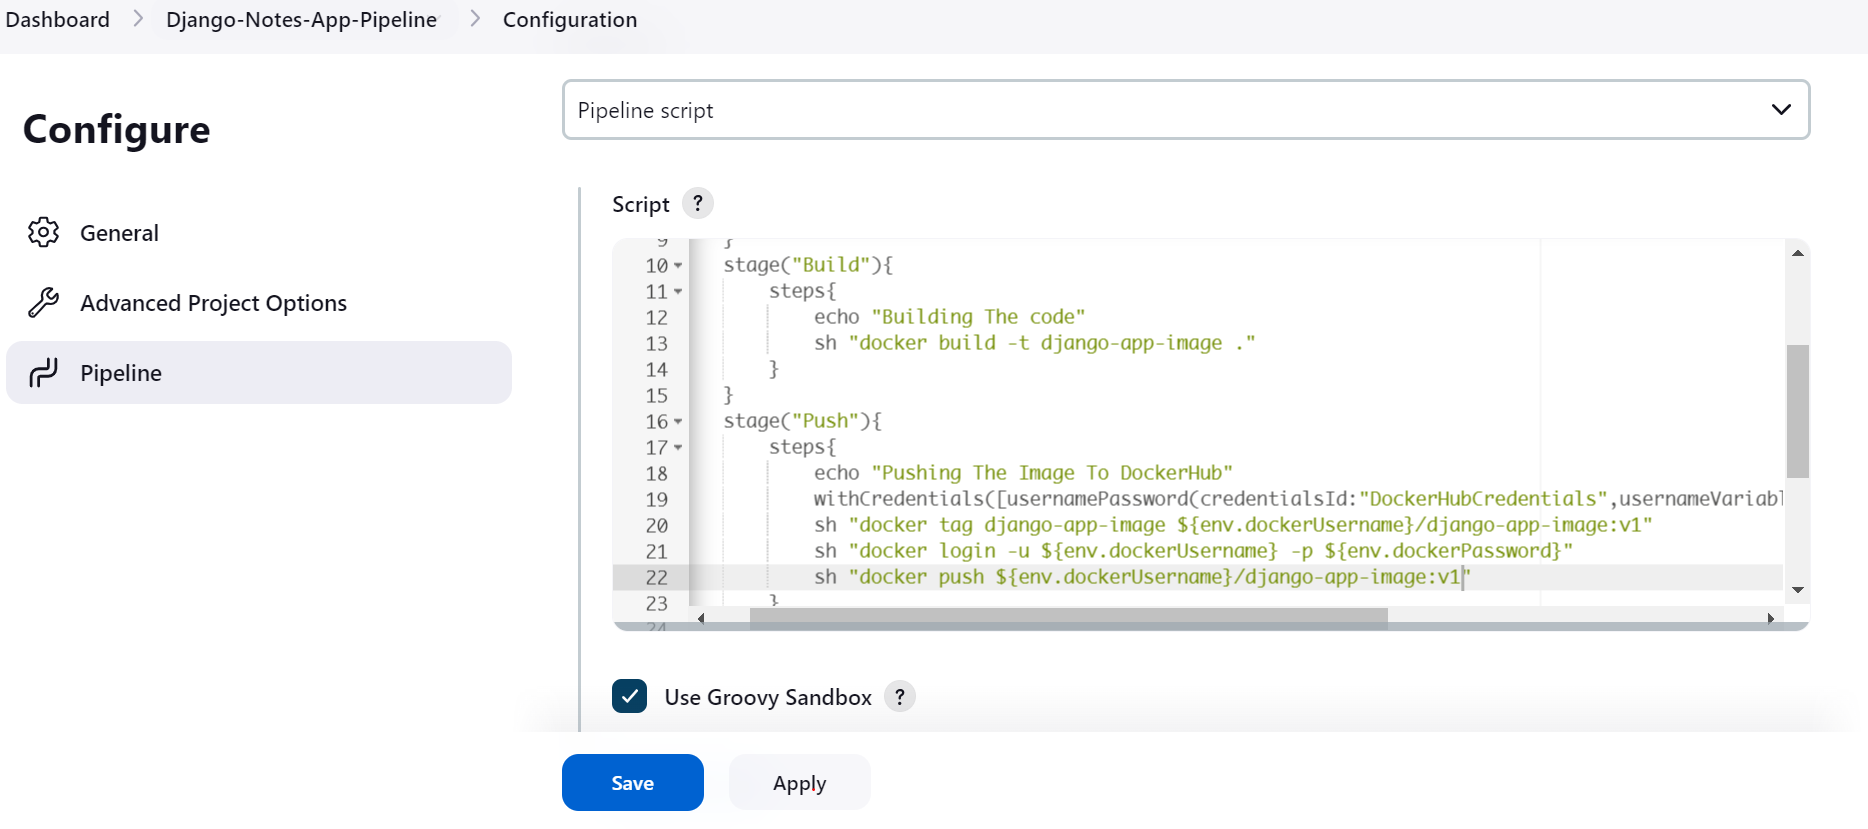
🏭Deploy Stage
In this
stage, we are deploying our application into the Docker container usingdocker-composethe file.sh "docker-cmpose down && docker-compose up -d"Make sure
docker-composeis installed in your system.Here we have to replace your
image nameinimagestatement inDocker-Compose File, Image that you have pushed into theDockerHub. OurCompose-Filewill fetch that image fromDockerHub.Also, we are exposing the
portshere(host-port:container-port)in theportsstatement.Here is the
Docker-composefile.version : "3.3" services : Web : #Image which we have pushed into DockerHub image : deepak1603/django-app-image:v1 ports : - "8000:8000"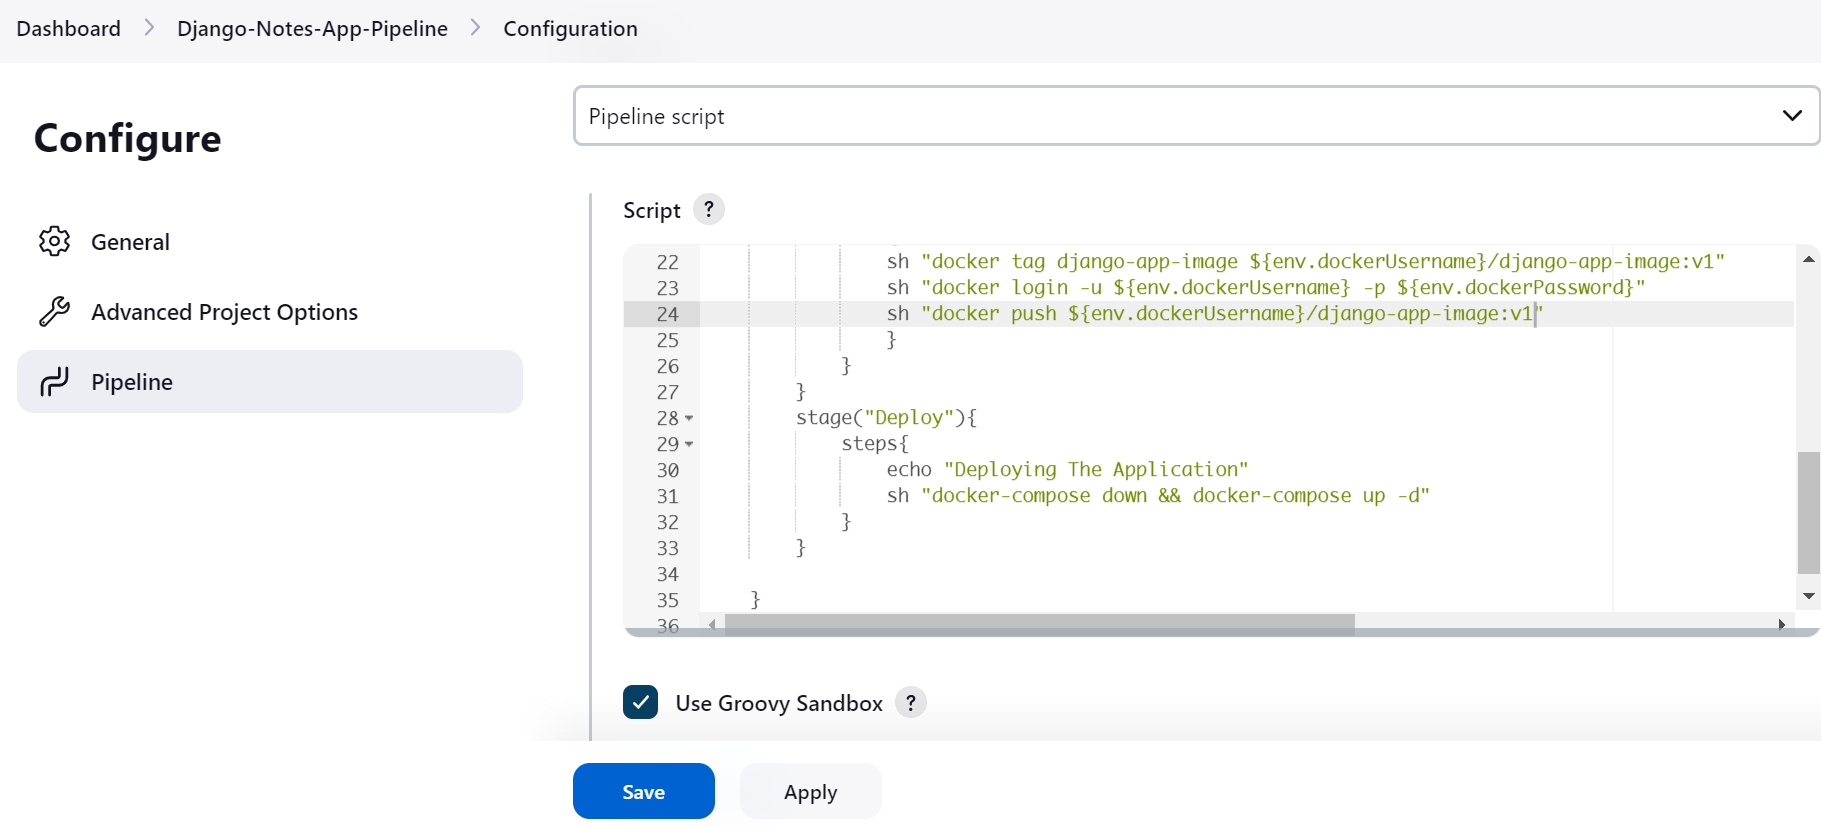
Now, In the final step click
Apply and Save.
⚙️Execute The Pipeline
Now, Go to the Dashboard/Create project pipeline and click on Build Now.
The
pipeline executionwill start ...Code will beColningfromGitHub,Docker imagewill be created,Image taggingwill be happening,DockerHub loginwill be happening, andPushing image into DockerHubwill be happening and finally, theDocker Containerwill be created with a single click .......Let's see the magic.
⚠️Error - 1
Once built here we are not able to build successfully because we have given the image name in capital letters see the below error.
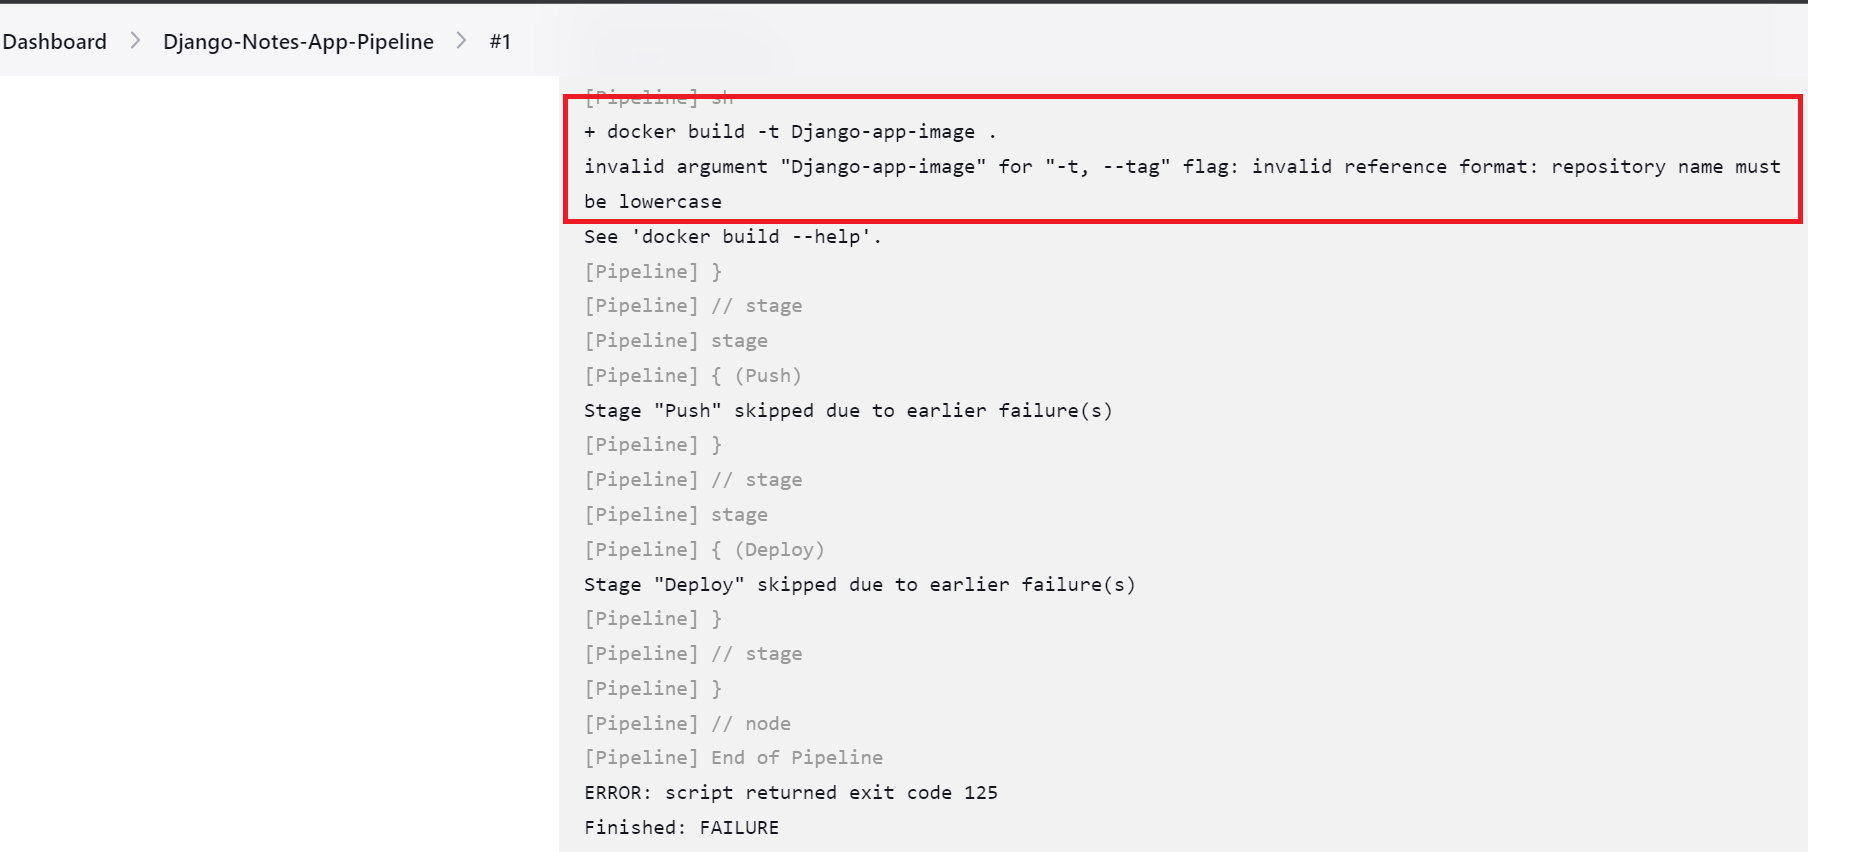
So we are changing the
Image Namehere withdjango-app-imageWherever applicable click onApply and Save.sh "docker build -t django-app-image ."Now after saving click on
Build Now.again.
⚠️Error - 2
Now, here we got another error which is regarding the
Permission deniedbecauseJenkins Useris not part of theDocker Group.We have to add
Jenkins Userinto theDocker Groupand Reboot the systemRun the below command in the terminal.
 sudo usermod -a -G docker jenkins
 sudo systemctl reboot
Now after adding
Jenkins Userto theDocker Group.Now after saving click on
Build Now.again.
⚠️Error - 3
Now, here we are getting one more error
withCredentials step must be called with a body.So make sure
withCredentialsis a function as we know, so we have to write the code inside the{ }brackets.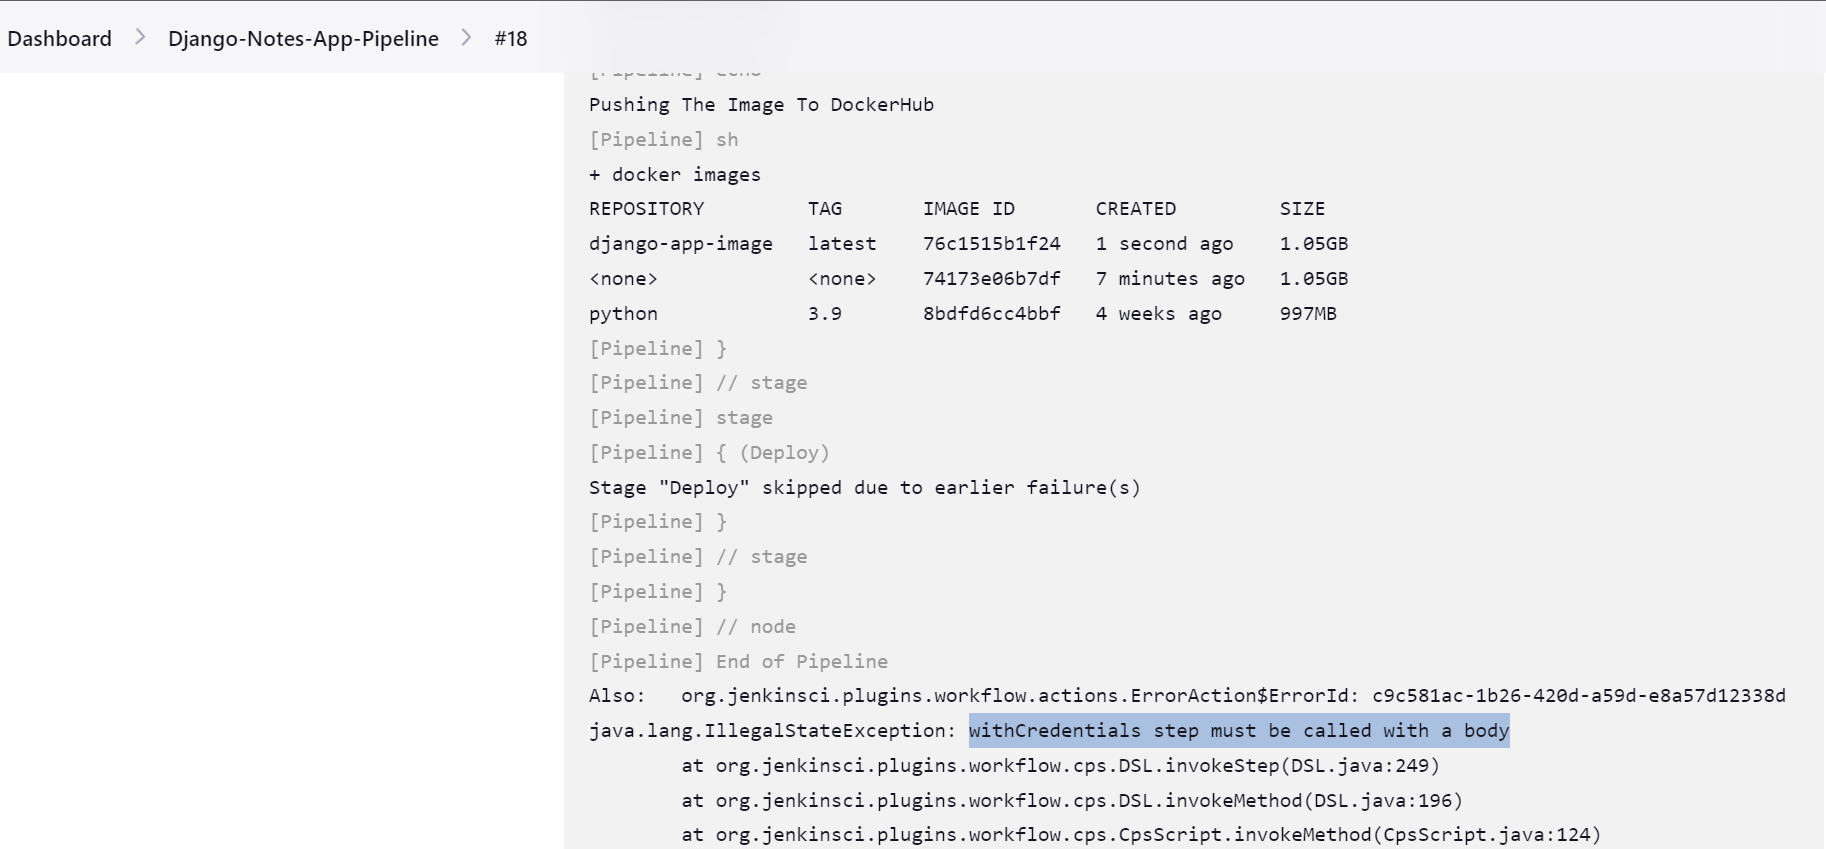
Here is the updated code of the
withCredentials()function.withCredentials([usernamePassword(credentialsId:"DockerHubCredentials", passwordVariable:"dockerPassword", usernameVariable:"dockerUsername")]) { sh "docker tag django-app-image ${env.dockerUsername}/django-app-image:v1" sh "docker login -u ${env.dockerUsername} -p ${env.dockerPassword}" sh "docker push ${env.dockerUsername}/django-app-image:v1" }After updating the changes again click on
Build Now. And let's see this time.
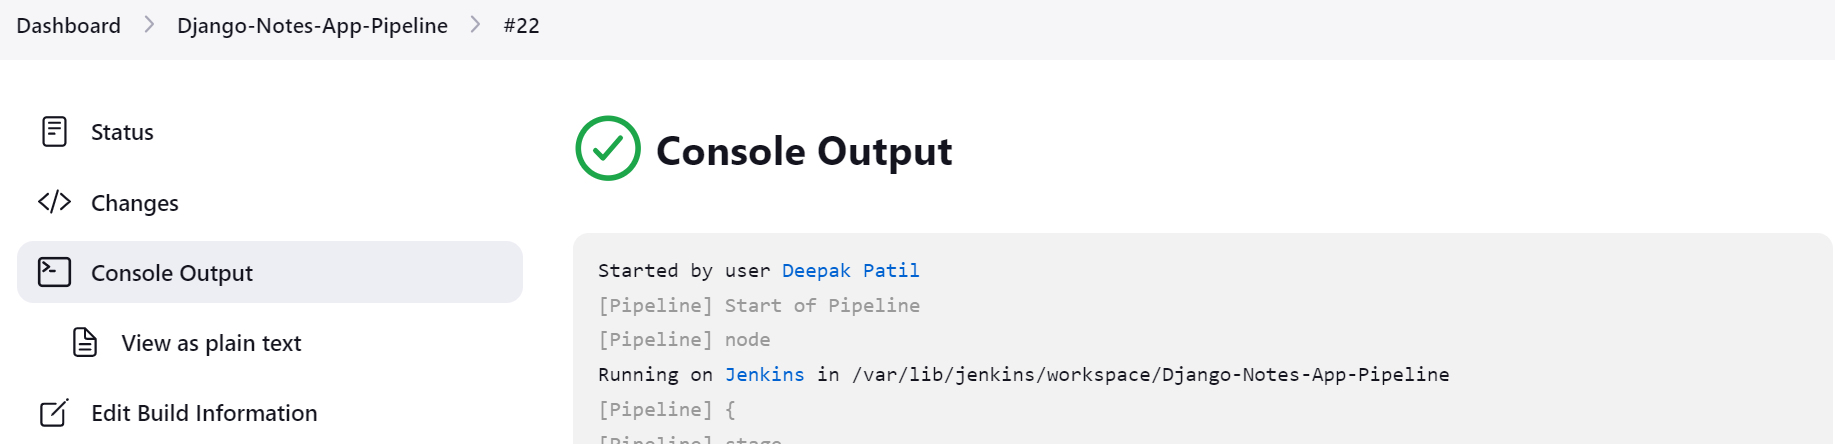
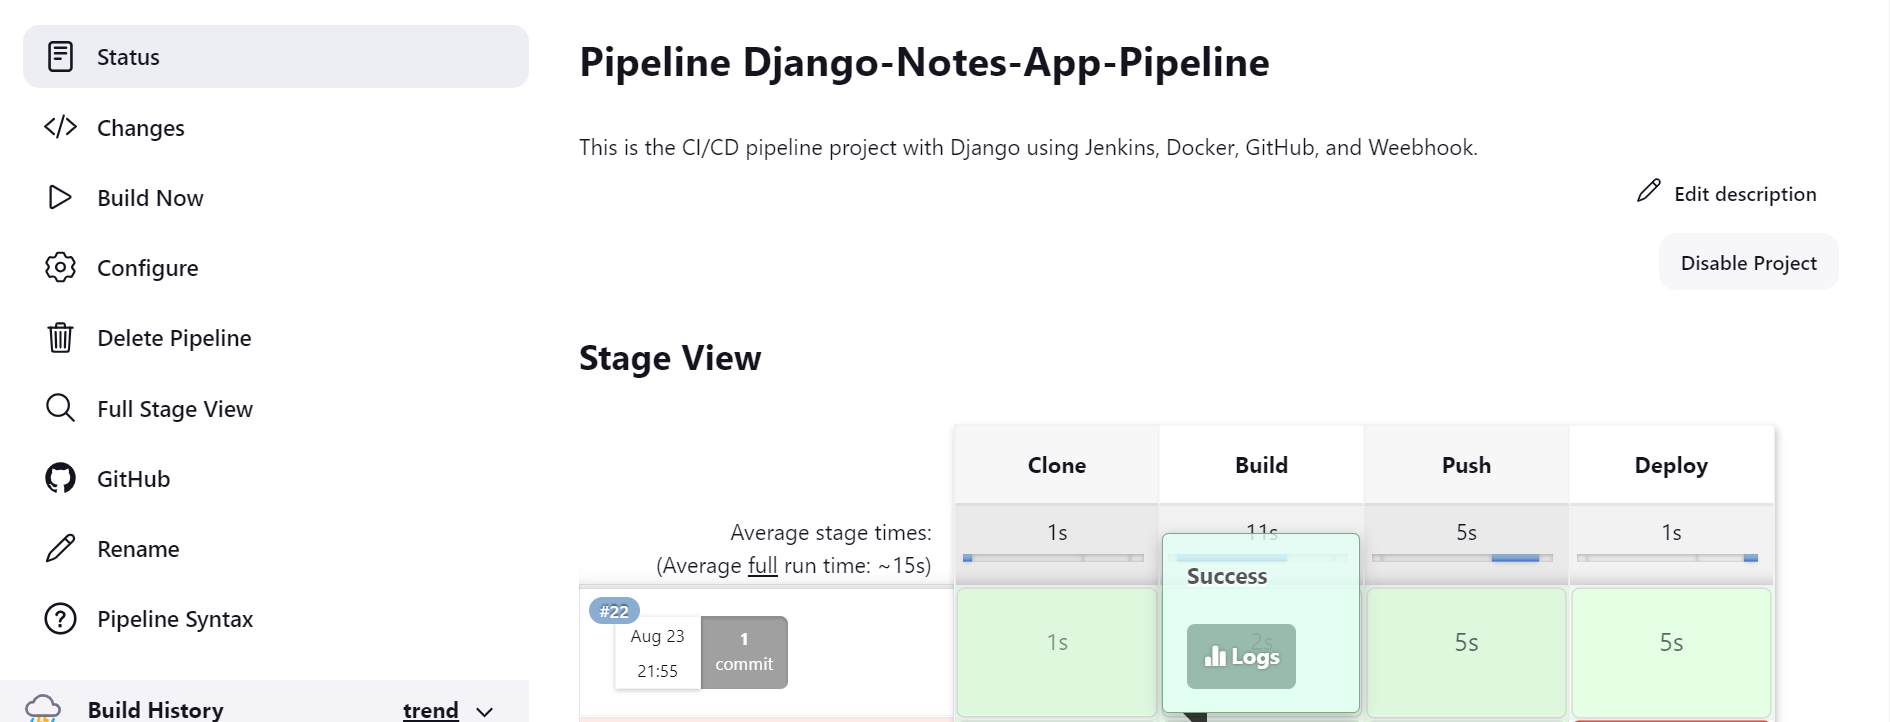
👏🎉🏆Successful Execution 🌟💯
Now, Finally, we are running our pipeline successfully you can see the Console output also the Pipeline Stage View .
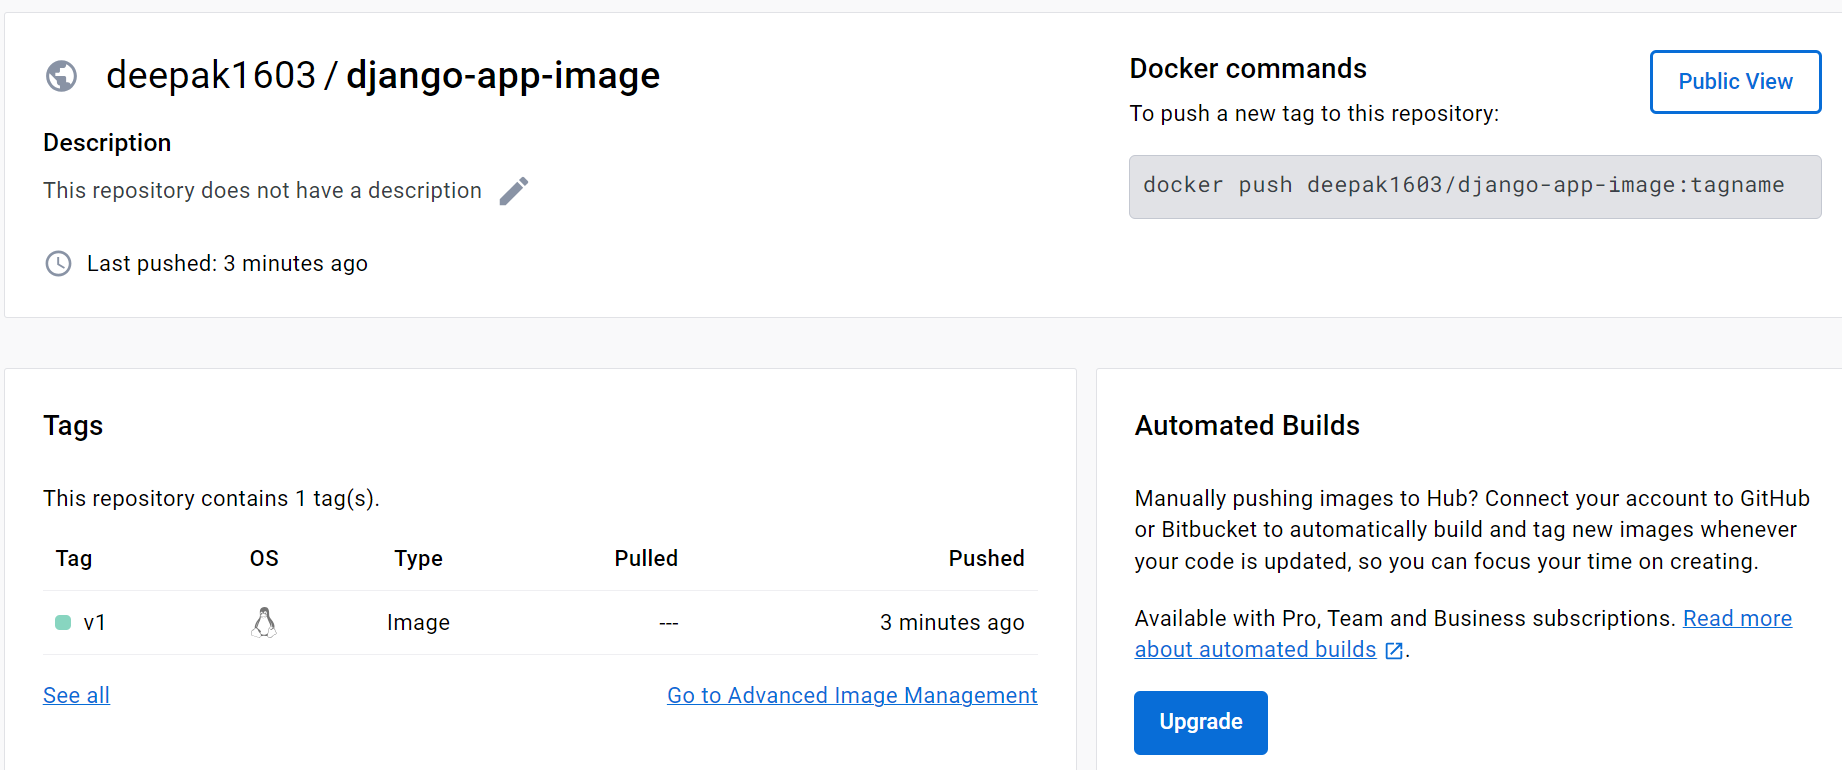
We are able to push the image into DockerHub.
Now finally we can check whether the Docker container is created or not.

🕺🕺👏👏🎉🎉 BoooooooooooooMMMM we are able to deploy the application successfully.
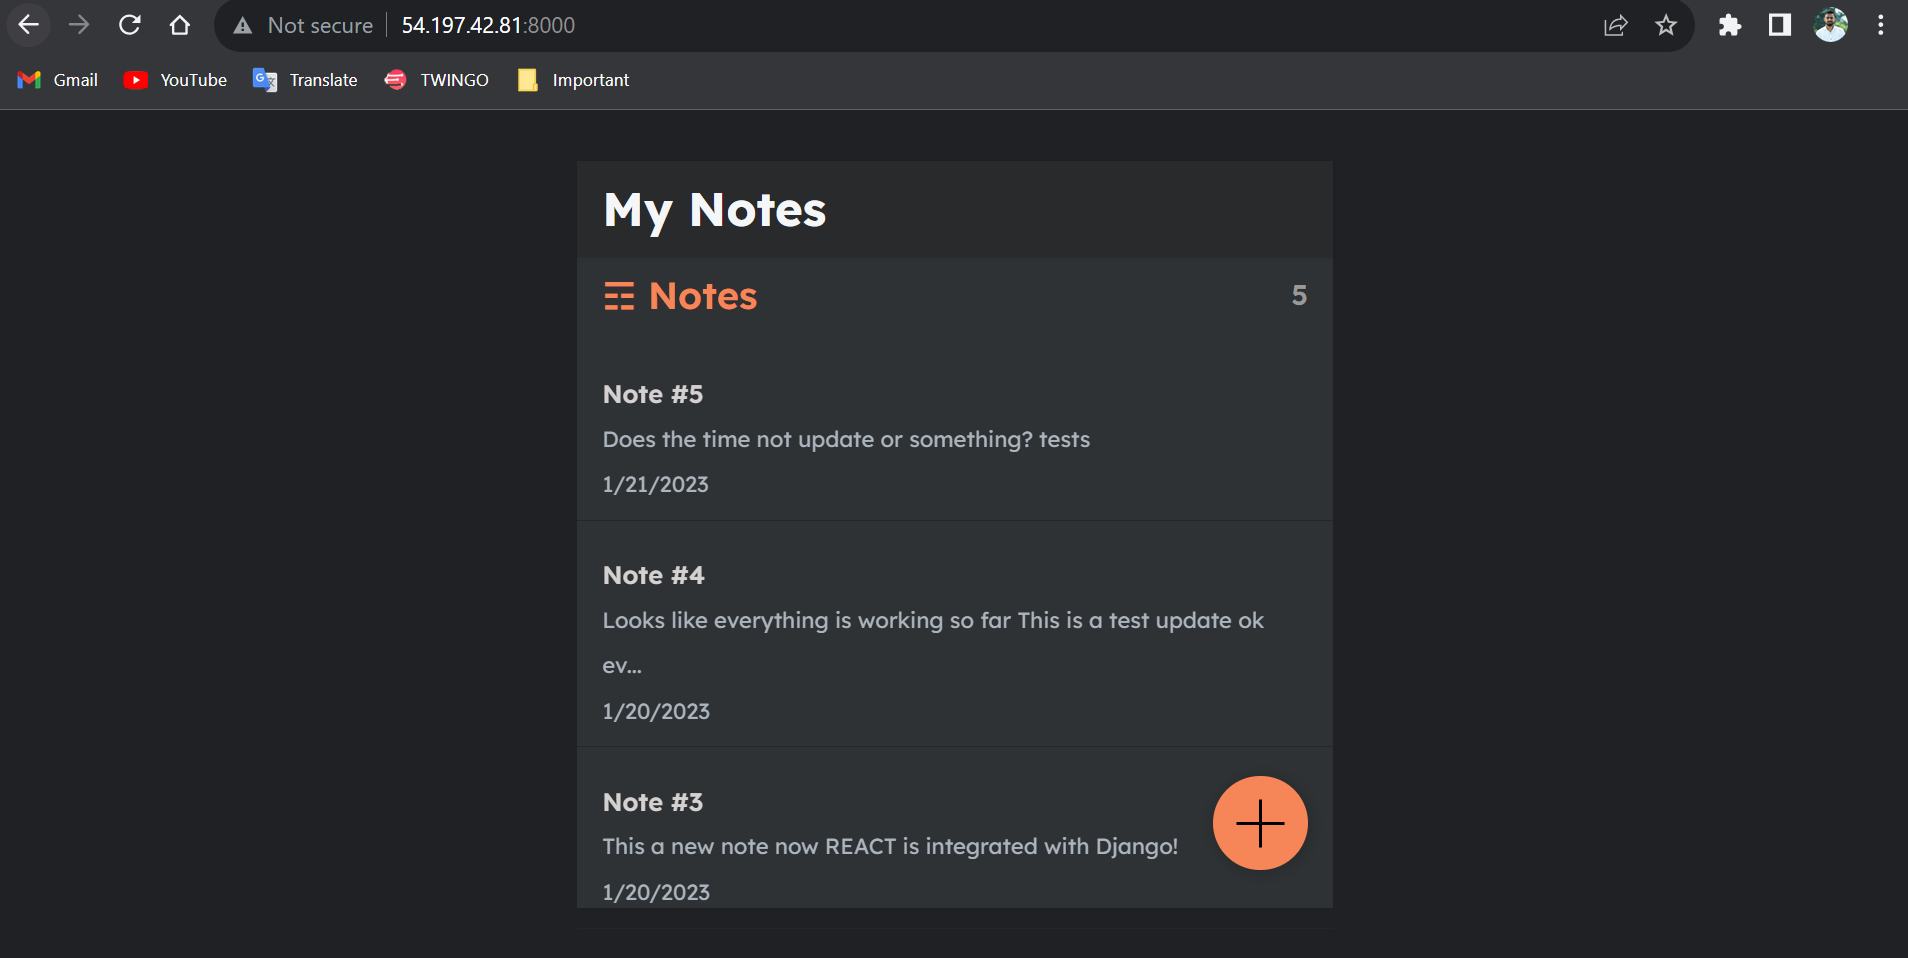
Now it's time to access our application from the browser.
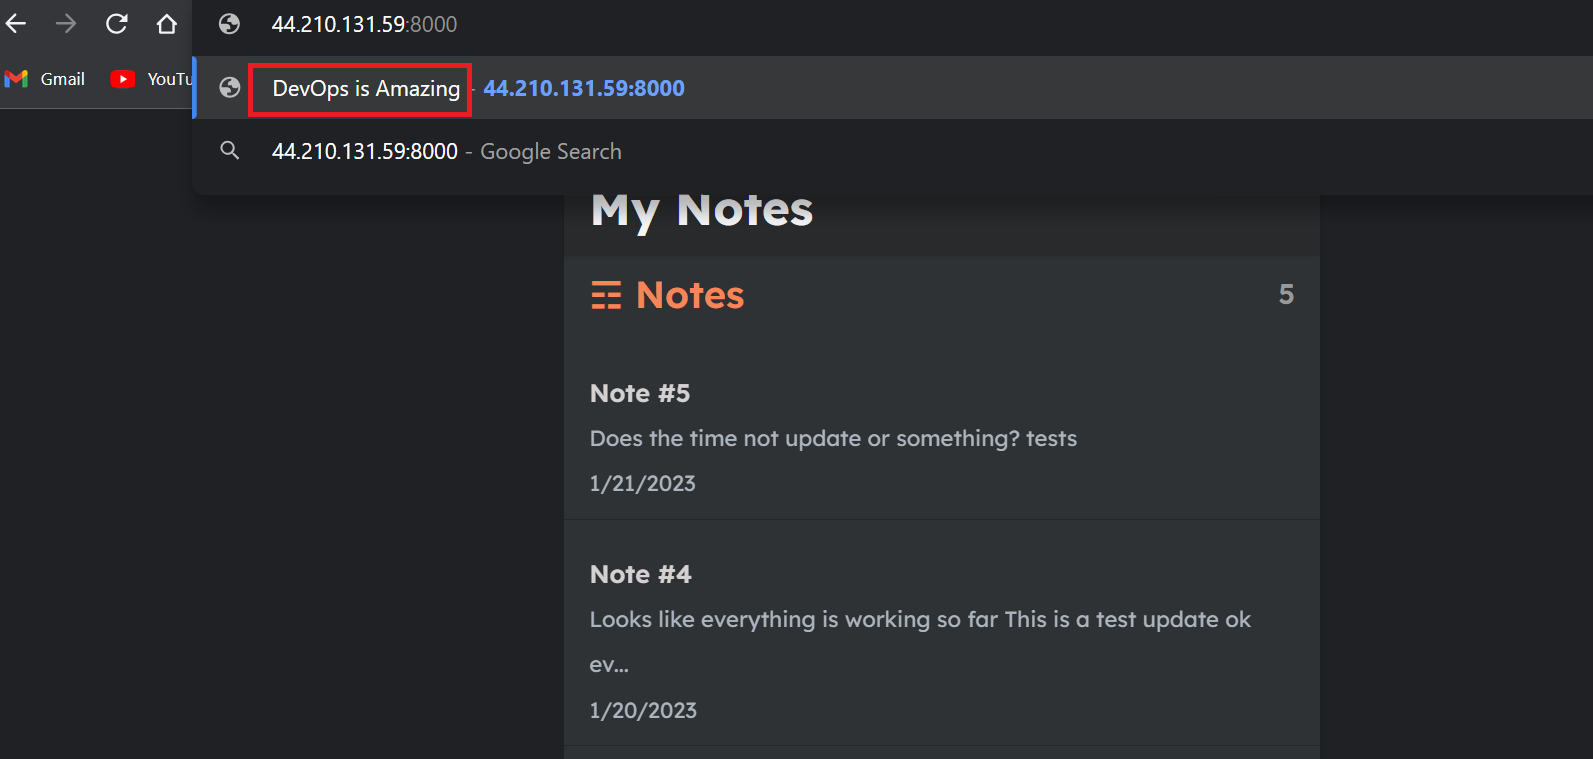
To access the application copy the EC2 instance IP Address and paste it into the browser along with :8000, Because our application is running on Port 8000 .
🕺🕺👏👏🎉🎉 BBBBBBBoooooooooooooMMMMMMMMMMMMMM we have successfully deployed our application using the Jenkins pipeline.🕺🕺👏👏🎉🎉
🔝CI/CD Automation
Now, it's time to make our Jenkins pipeline fully automated.
As of now, we are writing our pipeline code into the Jenkins script section.
Now, we will save our script code into GitHub also in the form of Jenkinsfile. and we are fetching the script code from GitHub instead of writing it into Jenkins.
Here is the Jenkins file(same above script code). We will store it at GitHub in the application code itself.
Here is the Jenkins file we will store on GitHub in the application code itself.
📦Executing the Jenkins File from GitHub
To Call Jenkins file From Jenkins, we have to make some modifications in the configure section shown below.
Goto
Dashboardand click onApplication Pipeline.Goto
PipelineinDefinitionselectPipeline script from SCM.Under
SCMselectGit.Under
Repositoriesenter theGitHub URL.
In
Brach SpecifierunderBranches to buildEnter your branch name in my case it ismain.In
Script Pathenter theJenkinsfileas path then click onApply andSave.
🏗️Automate Deployment Using GitHub-Webhook
Now, comes to the CI/CD Automation Using GitHub Webhook .
We will configure our Jenkins file to be executed after any changes are updated in the GitHub Repository.
To make it possible we will use here the Github Webhook.
Go to the Pipeline configure page in
Build Triggers.Select the checkbox
GitHub hook trigger for GITScm pollingClick on Apply and Save.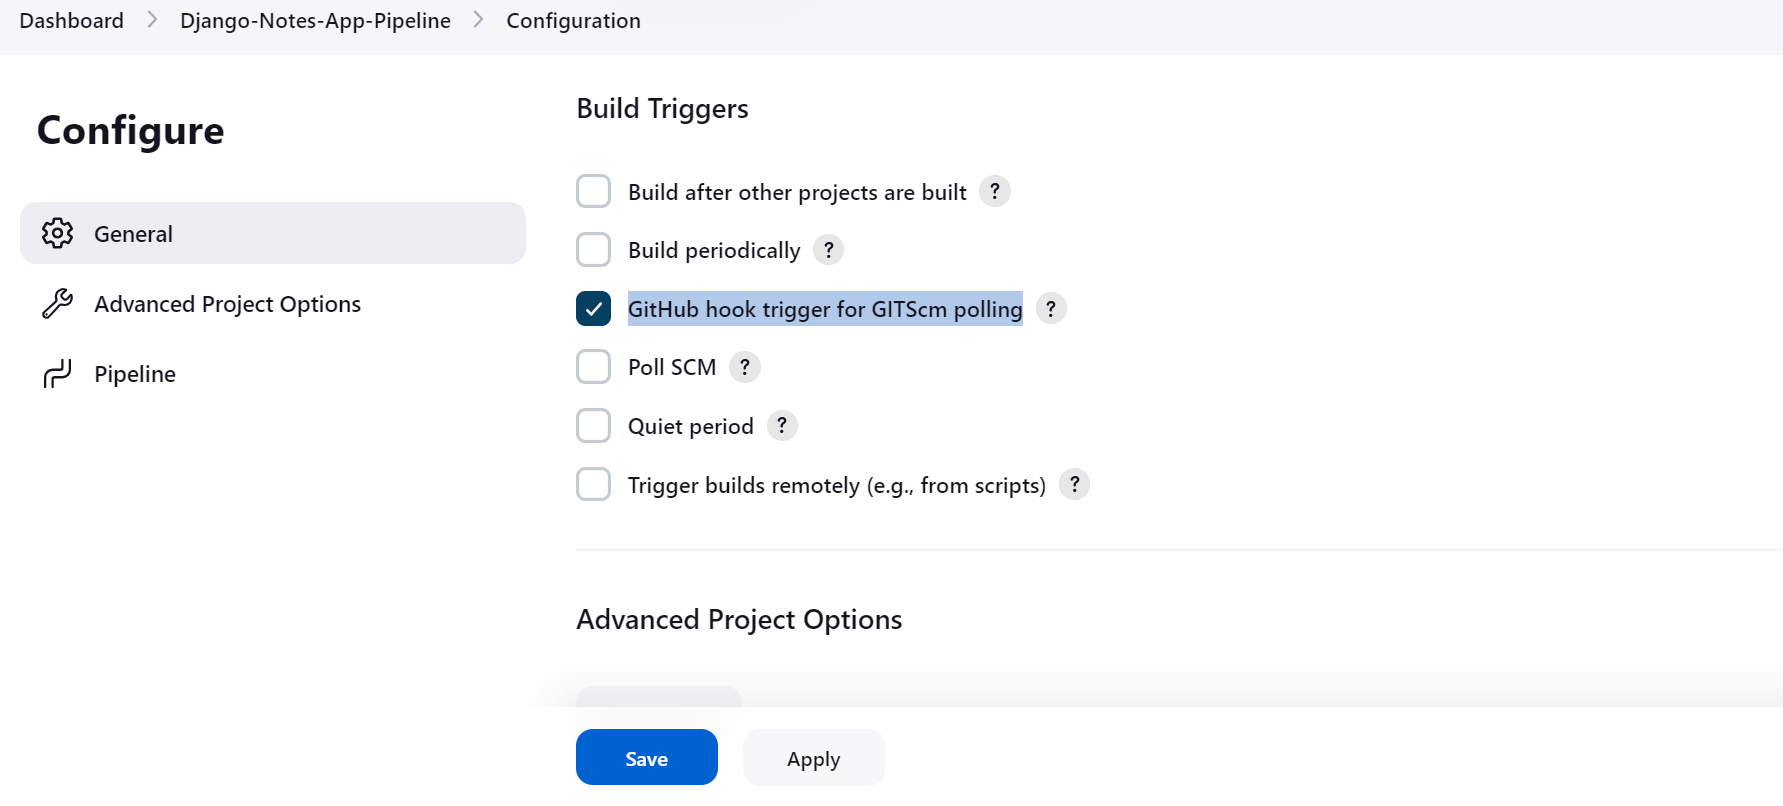
Also, we required
GitHub Integrationplugin got to plugin and install the required plugin.
🔗GitHub-Webhook Configuration
Go to your
GitHub repositoryand click onSettings.Click on
Webhooksand then click onAdd webhook.In the
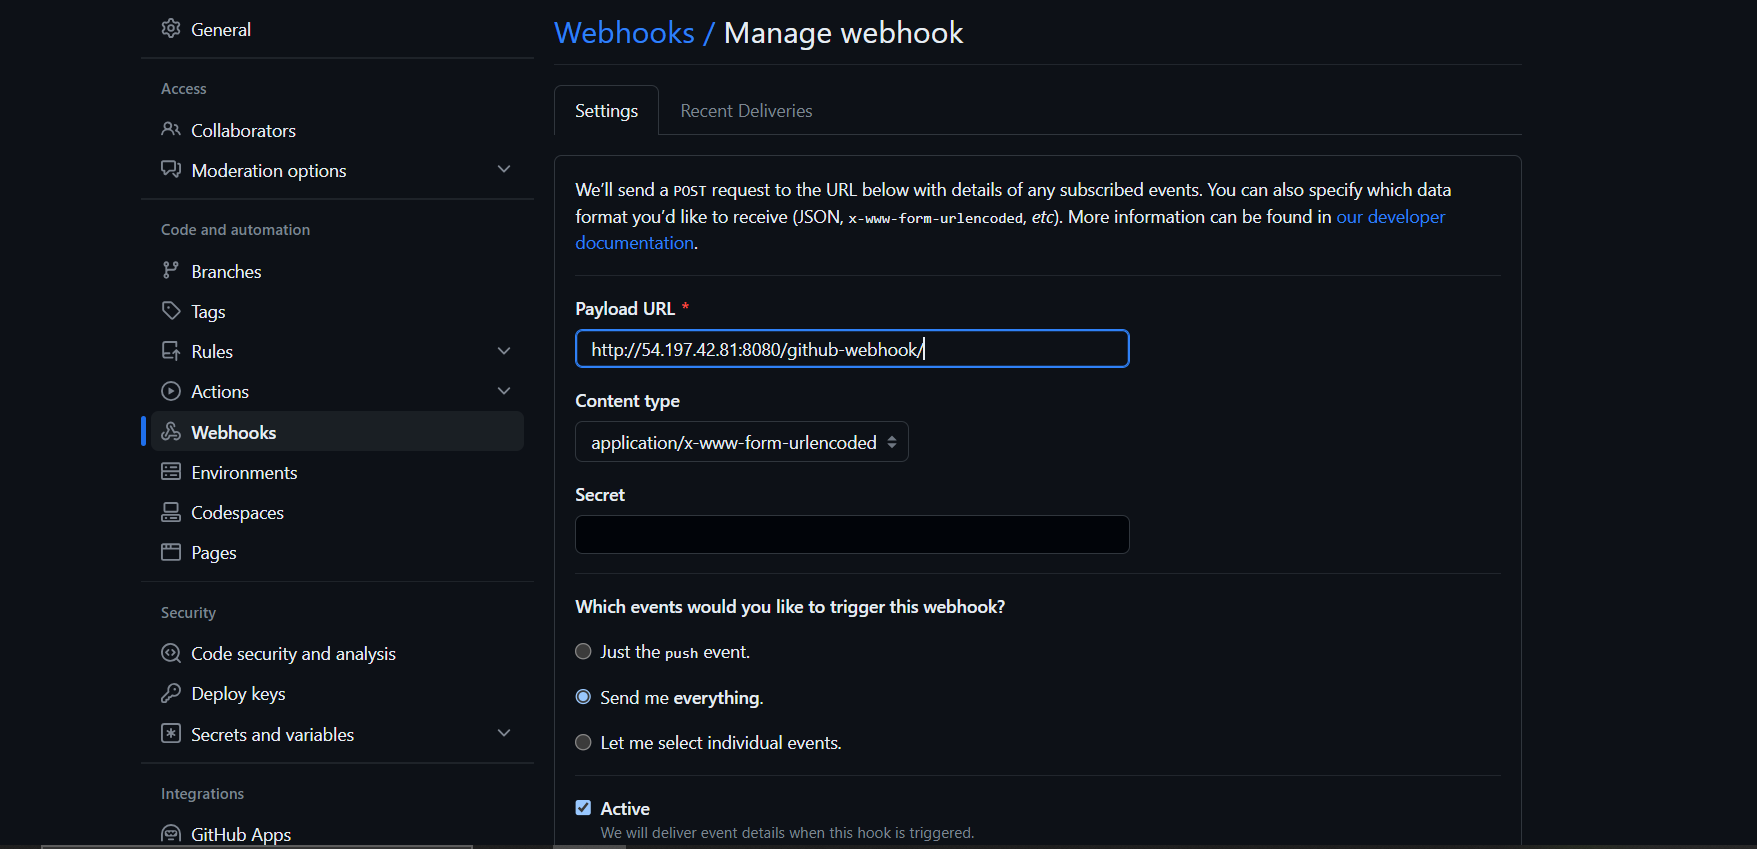
Payload URLfield copy and paste yourJenkins environment URL. and at the end of this URL add/github-webhook/In the
Content typeselect:application/jsonand leave theSecretfieldempty.In the
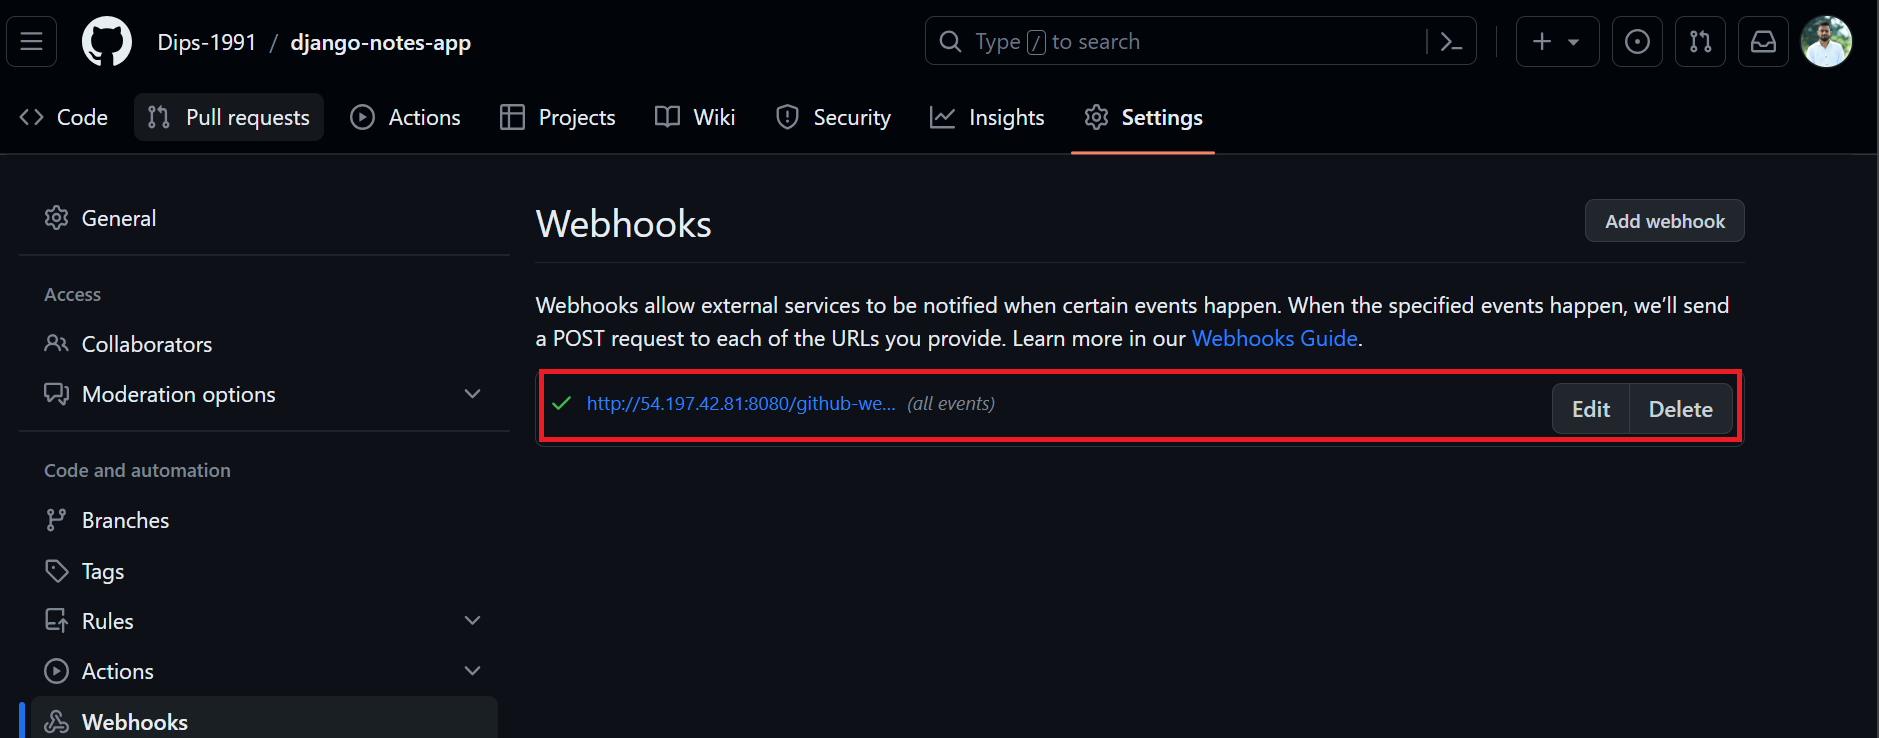
Which events would you like to trigger this webhook?section select as per your requirement and click onAdd webhook.Refreshthe page until you will get theRight sign✔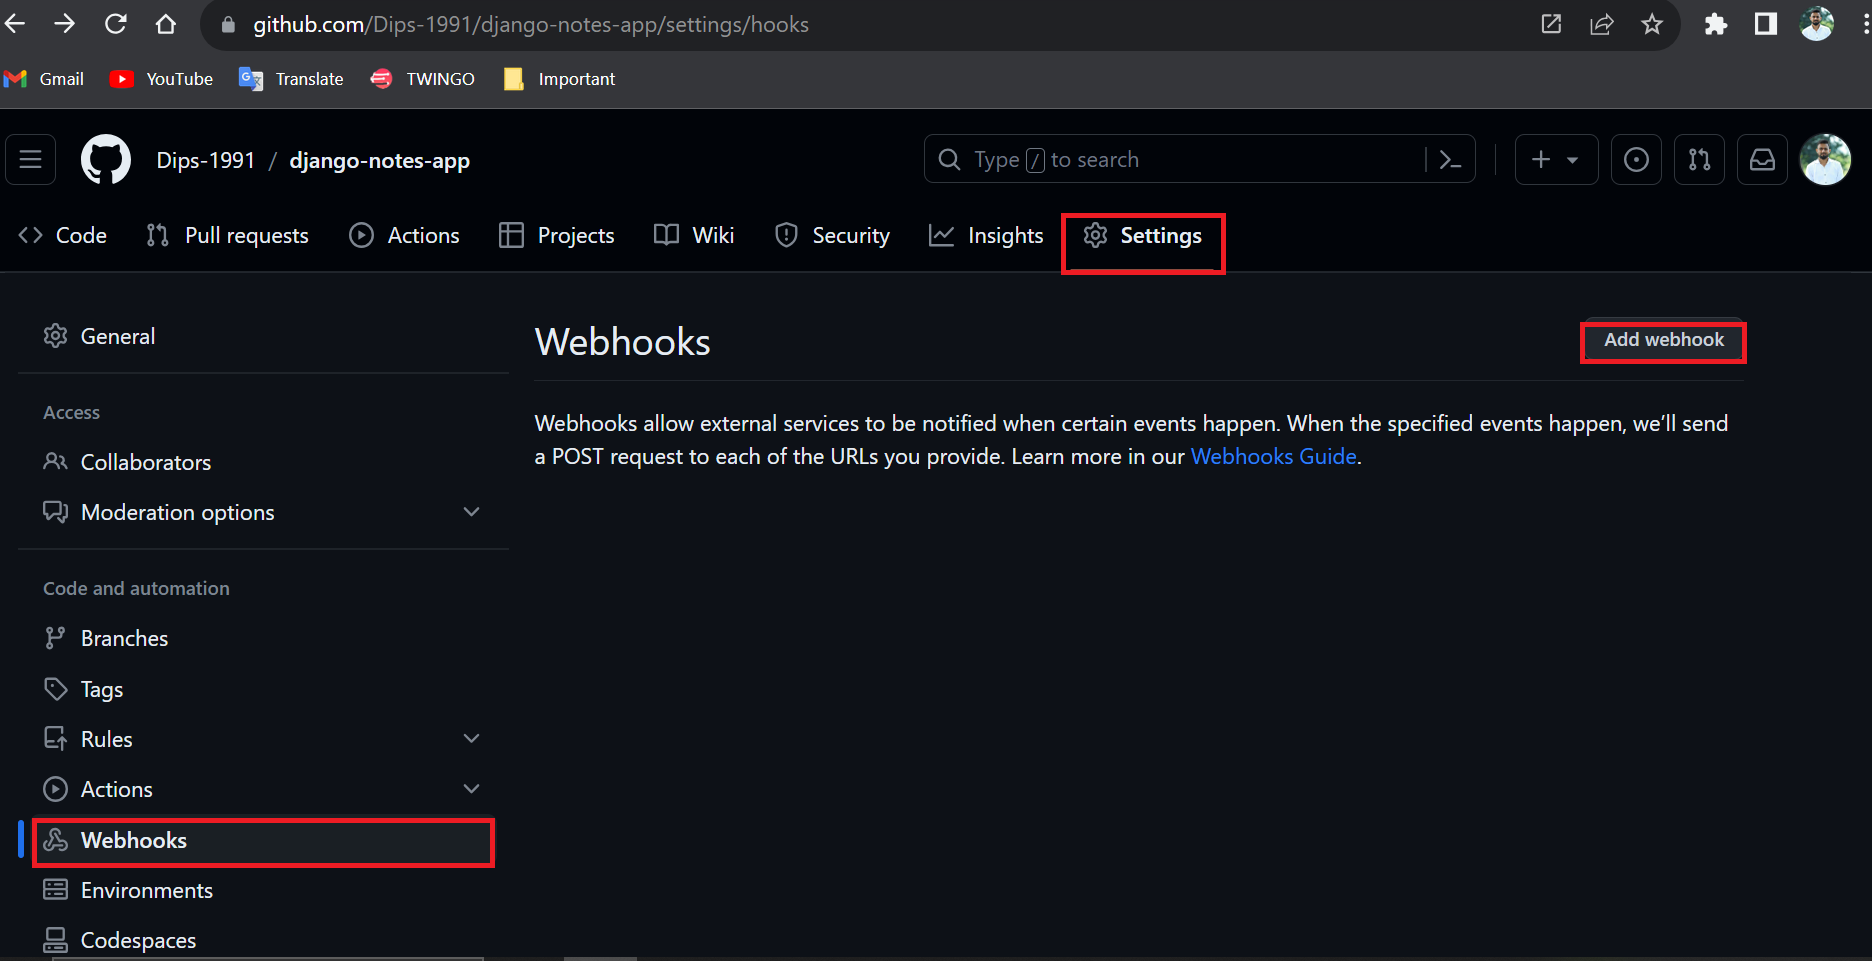
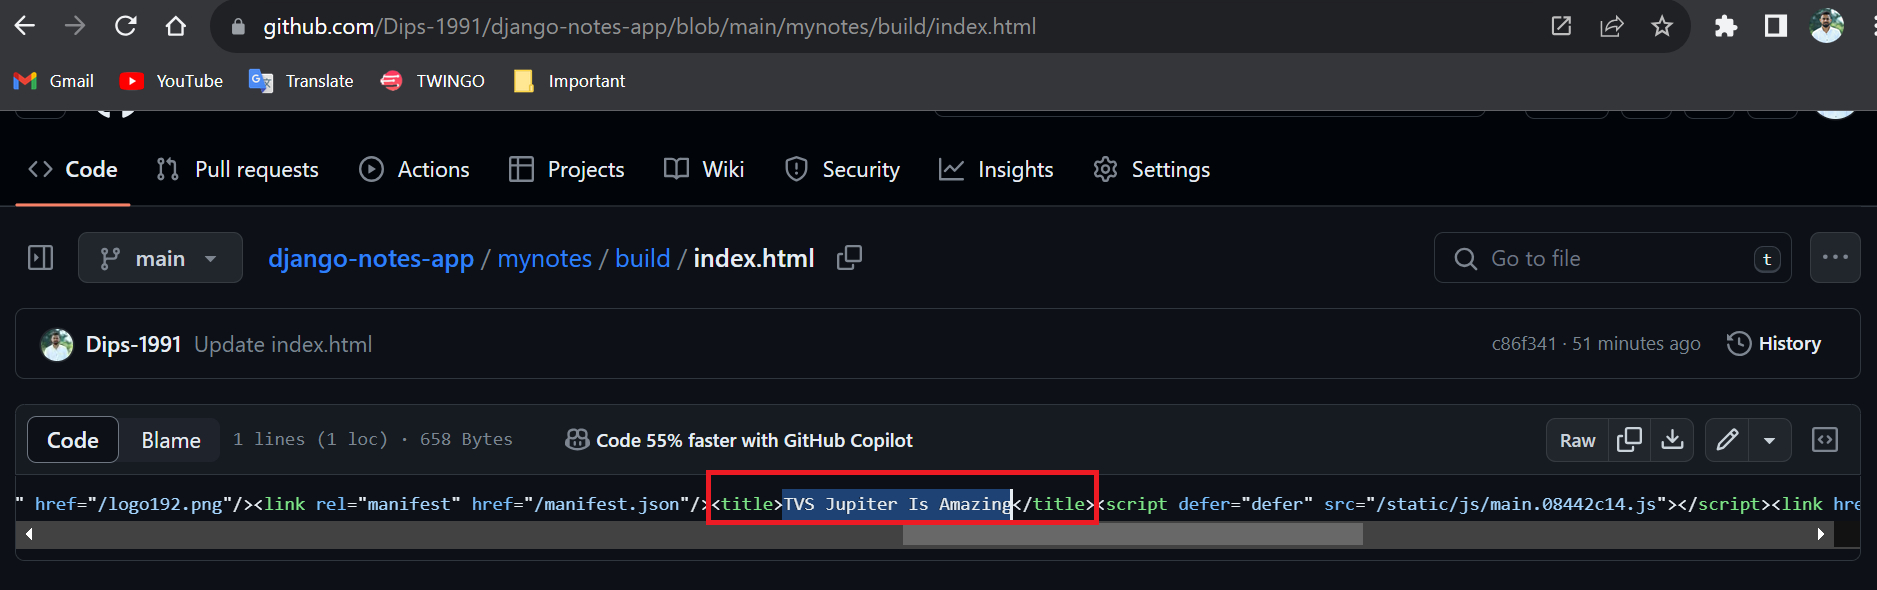
✔🔗Checking The WebHook Integration
We will Change the title from TVS Jupiter Is Amazing to DevOps is Amazing .
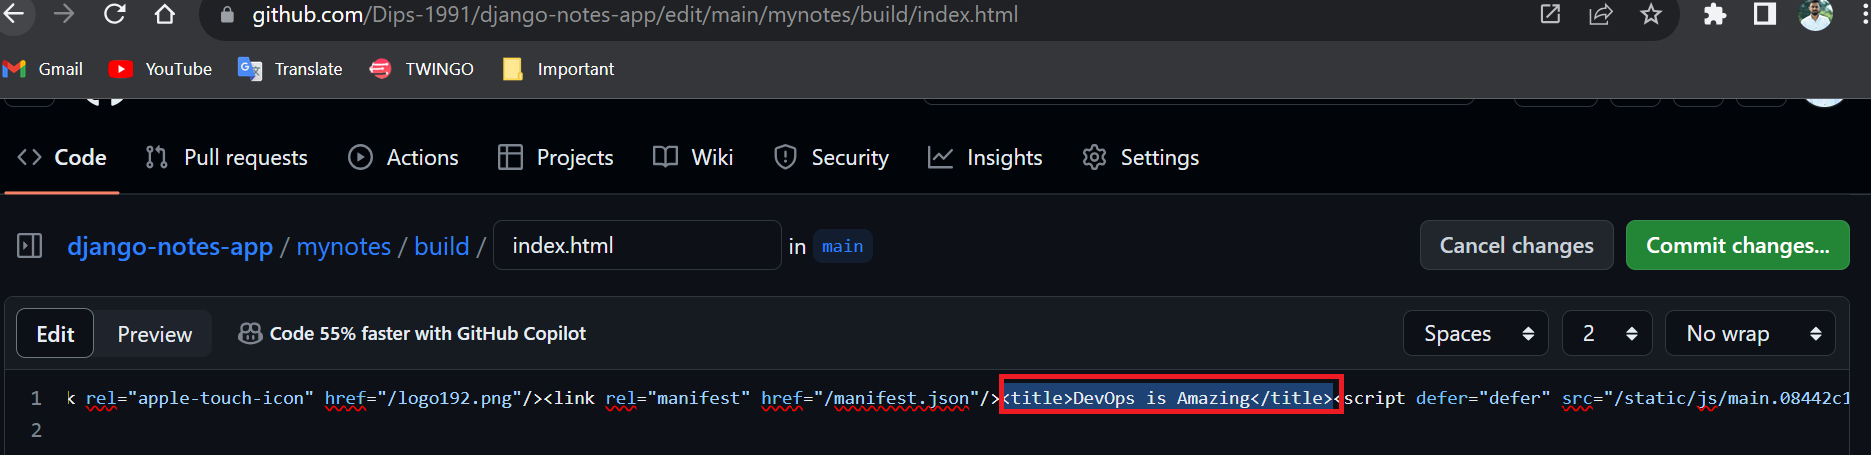
After we had changed the code in the repository and committed the changes the magic happens 🕺🕺👏👏🎉🎉... Our Job build execution starts without clinking on Build Now.
WebHook is added to trigger execution of Jenkins jobs based on GitHub events. If anyone in the developer team changes the code, it will automate the Build Now process .
✨Conclusion
✔In this post, we combined GitHub Jenkins Declarative Pipelines and Docker for enhanced CI/CD.
✔We used the sh command to run Docker commands within pipeline stages.
✔Then, we explored Docker Groovy syntax in the script block for smoother image creation and container handling.
✔We have done troubleshooting.
✔We have learned about Jenkinsfile
✔We have implemented the Wbhook call successfully.
Check Out the Video for Complete CI/CD Using Jenkins, Docker, GitHub, and Github-Webhook.
Thank you🙏🙏... for taking the time to read this blog. I hope you found the information helpful and insightful. So please keep yourself updated with my latest insights and articles on DevOps 🚀 by following me on
So, Stay in the loop and stay ahead in the world of DevOps!
Happy Learning !... Keep Learning ! 😊


