Day-23 Task: Jenkins Freestyle Project for DevOps Engineers.

Hey there! I am Deepak!! Passionate About Cloud & AWS☁️| DevOps ♾️ Technologies 👩🏻💻 And Skilled with Git 🔀 | Docker 🐳 | Kubernetes ☸ | Jenkins 🛠️
👏 Welcome to my blog!!
What is Jenkins?
Jenkins is an open-source continuous integration-continuous delivery and deployment (CI/CD) automation software DevOps tool written in the Java programming language. It is used to implement CI/CD workflows, called pipelines.
Jenkins is a tool that is used for automation, and it is an open-source server that allows all the developers to build, test and deploy software. It works or runs on Java as it is written in Java. By using Jenkins we can make a continuous integration of projects(jobs) or end-to-endpoint automation.
Jenkins achieves Continuous Integration with the help of plugins. Plugins allow the integration of Various DevOps stages. If you want to integrate a particular tool, you need to install the plugins for that tool. For example Git, Maven 2 project, Amazon EC2, HTML publisher, etc.
What is CI/CD?
CI or Continuous Integrationis the practice of automating the integration of code changes from multiple developers into a single codebase. It is a software development practice where the developers commit their work frequently to the central code repository (Github or Stash). Then there are automated tools that build the newly committed code and do a code review, etc as required upon integration. The key goals ofContinuous Integrationare to find and address bugs quicker, make the process of integrating code across a team of developers easier, improve software quality, and reduce the time it takes to release new feature updates.CD or Continuous Delivery/Deploymentis carried out after Continuous Integration to make sure that we can release new changes to our customers quickly in an error-free way. This includes running integration and regression tests in the staging area (similar to the production environment) so that the final release is not broken in production. It ensures to automate the release process so that we have a release-ready product at all times and we can deploy our application at any point in time.
What Is a Build Job?
A Jenkins build job contains the configuration for automating a specific task or step in the application building process. These tasks include gathering dependencies, compiling, archiving, or transforming code, and testing and deploying code in different environments.
Jenkins supports several types of build jobs, such as freestyle projects, pipelines, multi-configuration projects, folders, multibranch pipelines, and organization folders.
What is Freestyle Projects ?? 🤔
- A freestyle project in Jenkins is a type of project that allows you to build, test, and deploy software using a variety of different options and configurations.
Task 1: (Jenkins Freestyle project with Jenkins, GIT, Docker Dockerfile)
Create an agent for your app.
Create a new Jenkins freestyle project for your app.
In the
"Build"section of the project, add abuild stepto run the"docker build"command to build the image for the container.Add a second step to run the
"docker run"command to start a container using the image created in step 3.
To know more about installing Jenkins visit the link
https://deepakcloud22.hashnode.dev/day-22-getting-started-with-jenkins
Step: 1
1. Once install Jenkins Login to Jenkins using EC2 instance public IP with port 8080 <Public-IP>:8080
2. Then create a "New Item" freestyle project and click on Ok as shown below :
3. In this project, we required Docker to run the Docker container.
To install Docker use the below command sudo apt install docker.io -y

4. In General, we can specify descriptions of our job or Project.
5. We can specify a GitHub project with "Project URL" which we copied from GitHub repo URL.
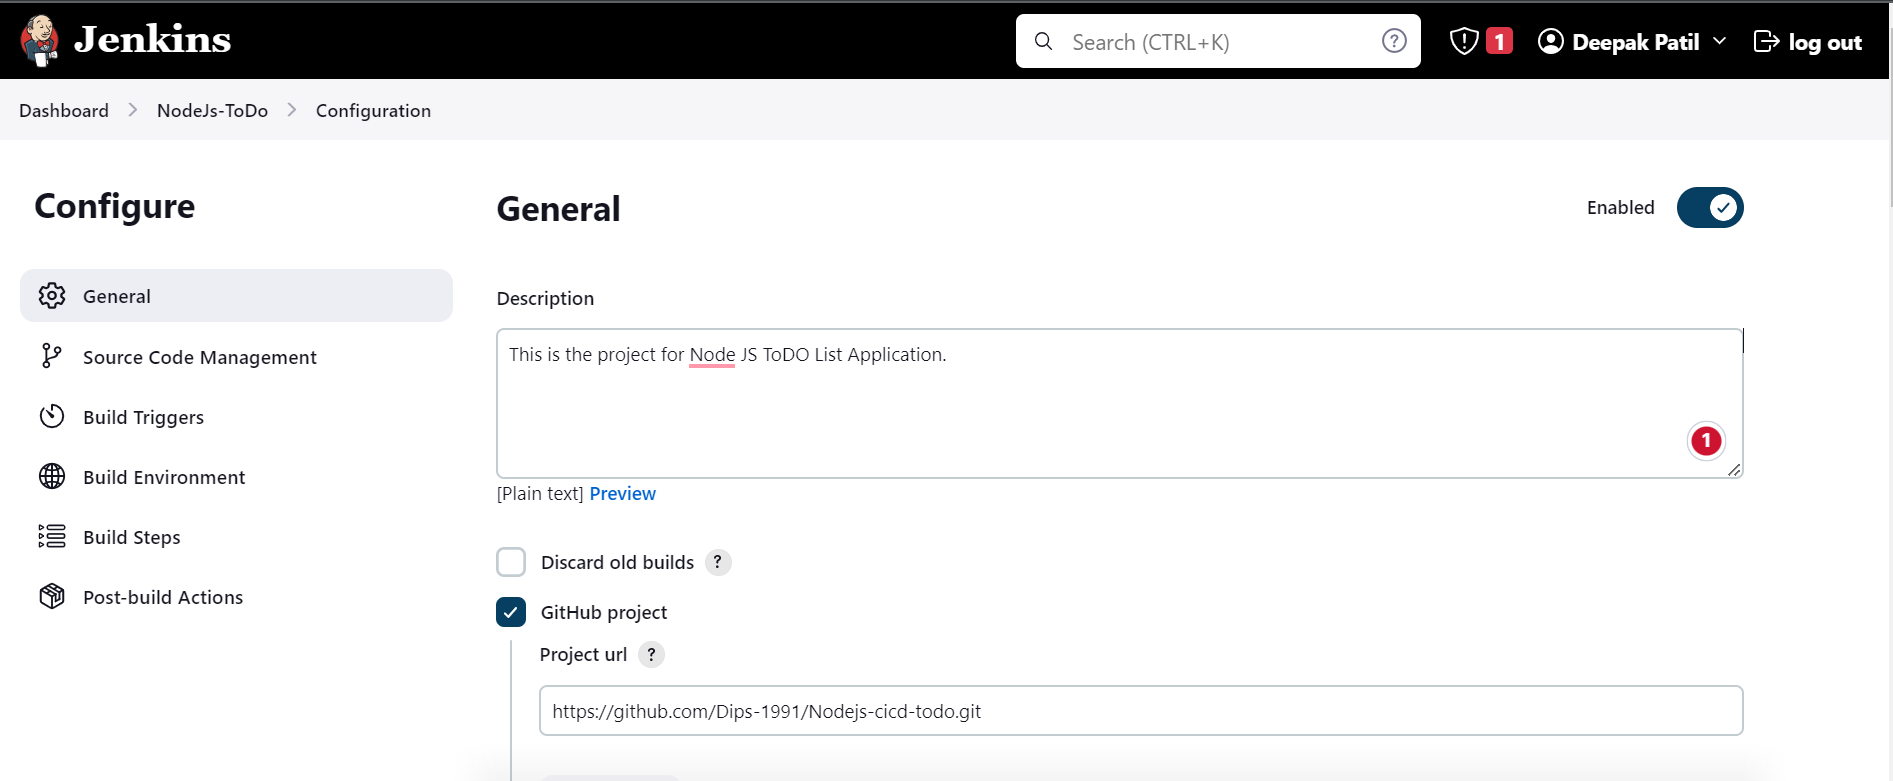
6. We could also specify Source code management with Git info by giving the repository URL, and specifying the branch name main/master in my case it is main as below.
Note: If the GitHub repository is Public then we do not need to provide credentials else repository is private then need to provide credentials.

7. In the "Build Steps" section of the project, select Execute shell and
Add a build step to run the
"docker build"command to build the image for the container.Add a second step to run the
"docker run"command to start a container using the image created in step 3. and click onApply and Save
Note: To avoid permission being denied while trying to connect to the Docker daemon add Jenkins user into the docker group using the below command sudo usermod -a -G docker jenkins and reboot the instance sudo reboot

8. Now, Yo will inside the project and click on Build Now to build the project
After successfully build under the Build History click on the build number prefix with # and see the Console Output with all the steps executed by Jenkins


9. We can see the projects deployed from GitHub at the location
cd /var/lib/jenkins/workspace as well

10. Now we will check the image which we have created using Dockerfile and the container which we have deployed using the image using the below commands
sudo docker images To see all the images at the docker host
sudo docker ps To see all the running containers

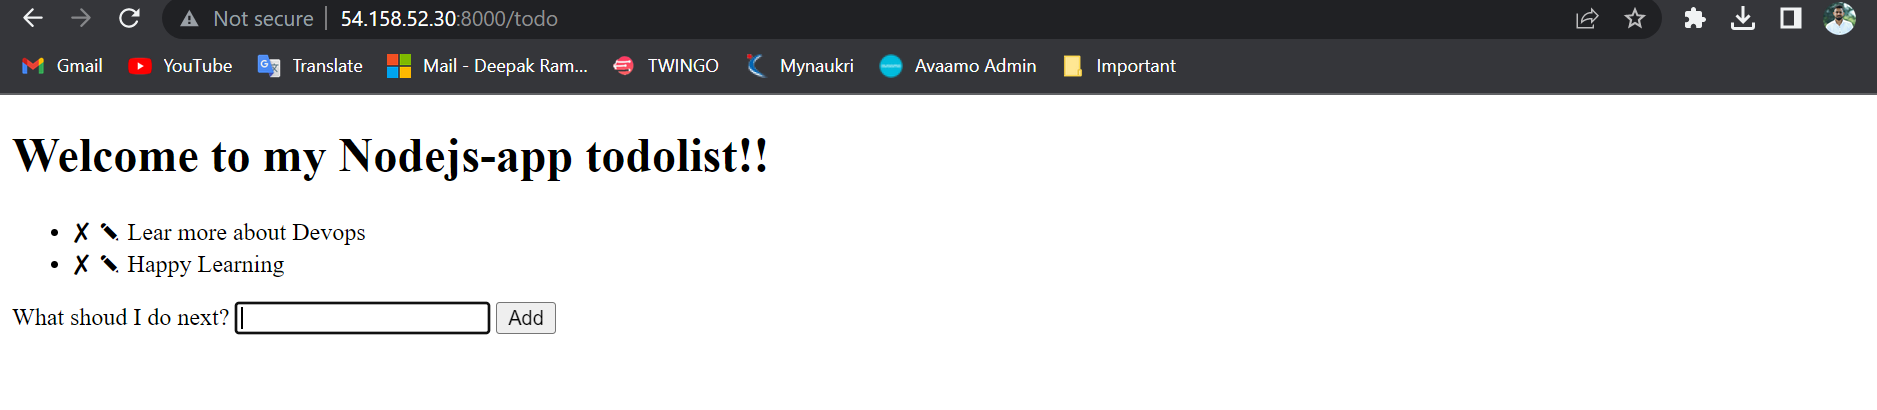
11. Now use copy the EC2 instance public ip and paste it into the browser followed by :8000 and app name
<Public-IP>:8000/todo
Note: Expose port 8000 into the EC2 instance security group by adding edit inbound rule
Congratulation our application is successfully deployed and accessible
🕺🕺👏👏🎉🎉
Task 2: (Jenkins Freestyle project with Jenkins, GIT, Docker DocerCompose File.)
Create a Jenkins project to run the
"docker-compose up -d"command to start the multiple containers defined in the compose file.Set up a cleanup step in the Jenkins project to run the
"docker-compose down"command to stop and remove the containers defined in the compose file.
Step1
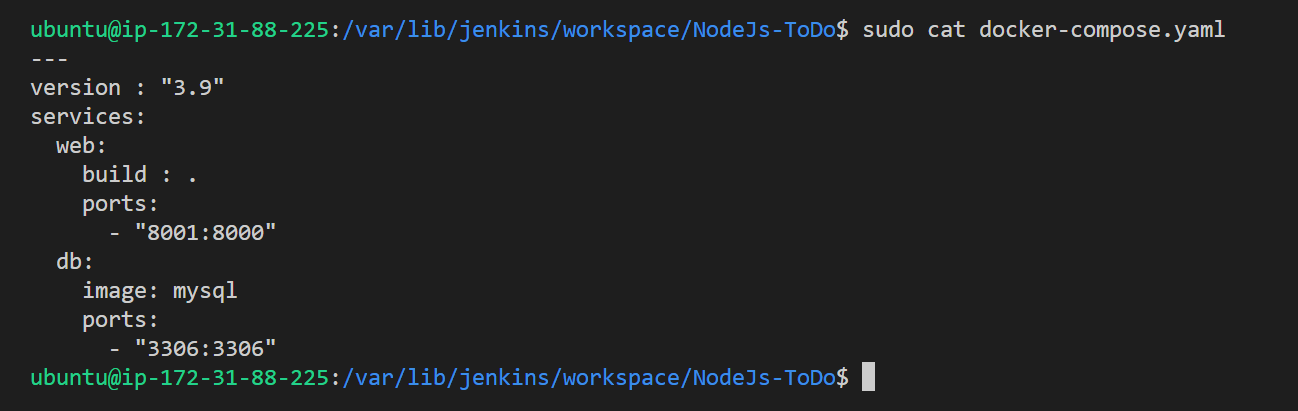
1. In continuing to the first task, we create docker-compose.yml the file inside our project. Make sure docker-compose should be installed.
To install use the command sudo apt-get install docker-compose -y
To validate the docker-compose file use command
sudo docker-compose config
To see the docker-compose use command cat docker-compose.yaml

2. In Build step a section, add build steps like this. Here docker compose down is taken first to remove and stop the containers define in the compose file then afterward we use docker compose up -d the command to deploy the container. click on Apply and save

3. Now click on Build Now Build the project and see the console output by clicking on Console Output

4. Now you can see the container is created

5. The compose container also working as expected on port 8001

Reference: Shubham Londhe : Video
Thank you for reading the article.
Thanks for your valuable time.
Happy Learning !... Keep Learning ! 😊


