Day-19 Task: Docker for DevOps Engineers(Docker Volume): Part-4

Hey there! I am Deepak!! Passionate About Cloud & AWS☁️| DevOps ♾️ Technologies 👩🏻💻 And Skilled with Git 🔀 | Docker 🐳 | Kubernetes ☸ | Jenkins 🛠️
👏 Welcome to my blog!!
What is Docker?
Docker is an open platform for developing, shipping and running applications. Docker enables you to separate your applications from your infrastructure so you can deliver software quickly. With Docker, you can manage your infrastructure in the same ways you manage your applications. By taking advantage of Docker’s methodologies for shipping, testing, and deploying code quickly, you can significantly reduce the delay between writing code and running it in production.
To learn more about docker visit the link https://deepakcloud22.hashnode.dev/day-16-task-docker-for-devops-engineers-part-1
What is Docker volume?
Docker allows you to create something called volumes. Volumes are like separate storage areas that can be accessed by containers.
They allow you to store data, like a database, outside the container, so it doesn't get deleted when the container is deleted.
You can also mount from the same volume and create more containers having the same data.
Useful Docker Volume Command
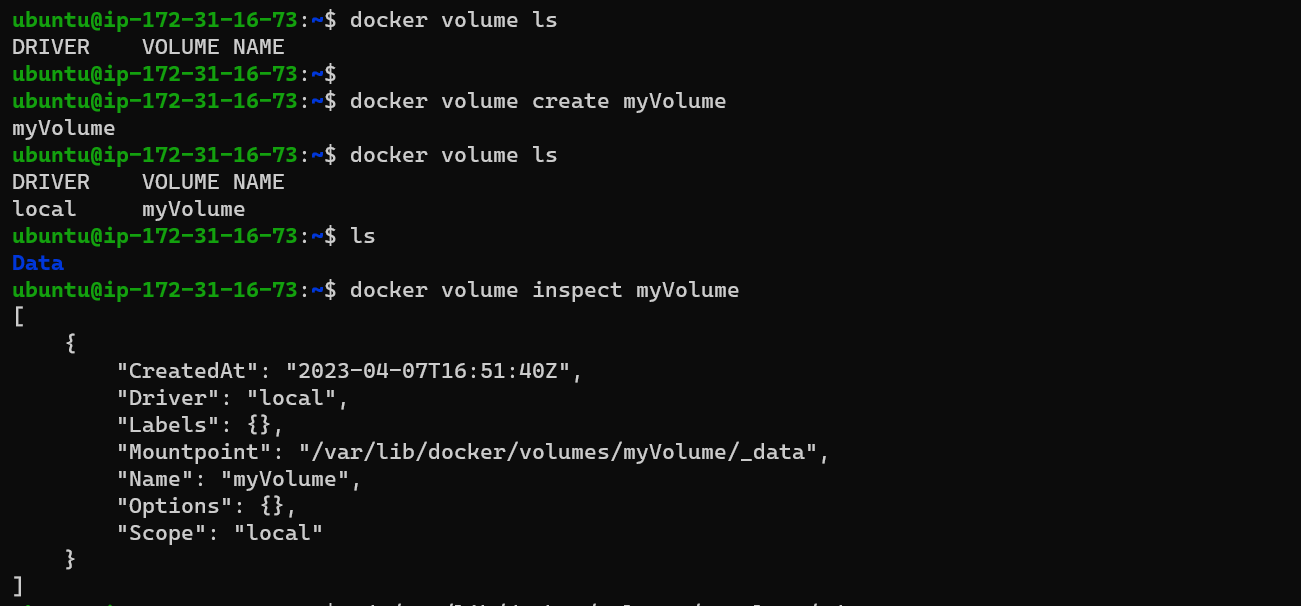
Creating Docker Volumes: To create the new docker volume
docker volume create [volume-name]Displaying Available Volumes: To show all docker volumes
docker volume lsInspecting Docker Volumes :
The volume inspects the command of the docker daemon and provides us with essential information about a particular volume.
docker volume inspect [volume-name]Deleting Specific Volumes: To delete the docker volume
docker volume rm [volume-name]Deleting All Volumes: To delete all the available docker volumes
docker volume prune
Different mechanisms to persist data in Docker
There are two mechanisms for persisting data generated by and used by Docker containers.
Bind mounts
Docker volume
Use volumes. Volumes are the preferred mechanism for persisting data generated by and used by Docker containers.
While bind mounts are dependent on the directory structure and OS of the host machine, volumes are completely managed by Docker. Volumes have several advantages over bind mounts: Volumes are easier to back up or migrate than bind mounts.
Example Bind mount:
Here we will attach local storage with the containers as a bind mount.
Make sure the docker is installed in your system. To install and check docker in Ubuntu OS use the below command.
sudo apt install docker.io -y To install docker in Ubuntu OS
sudo docker --version To check the docker version
To attach the bind mount with the containers use the below command
sudo docker run -[it/d] name[containername] -p[ports] -v [localhost-path]:[container-path] [image-name]
Here we can create some files in the container location and it will be
syncedwith the host location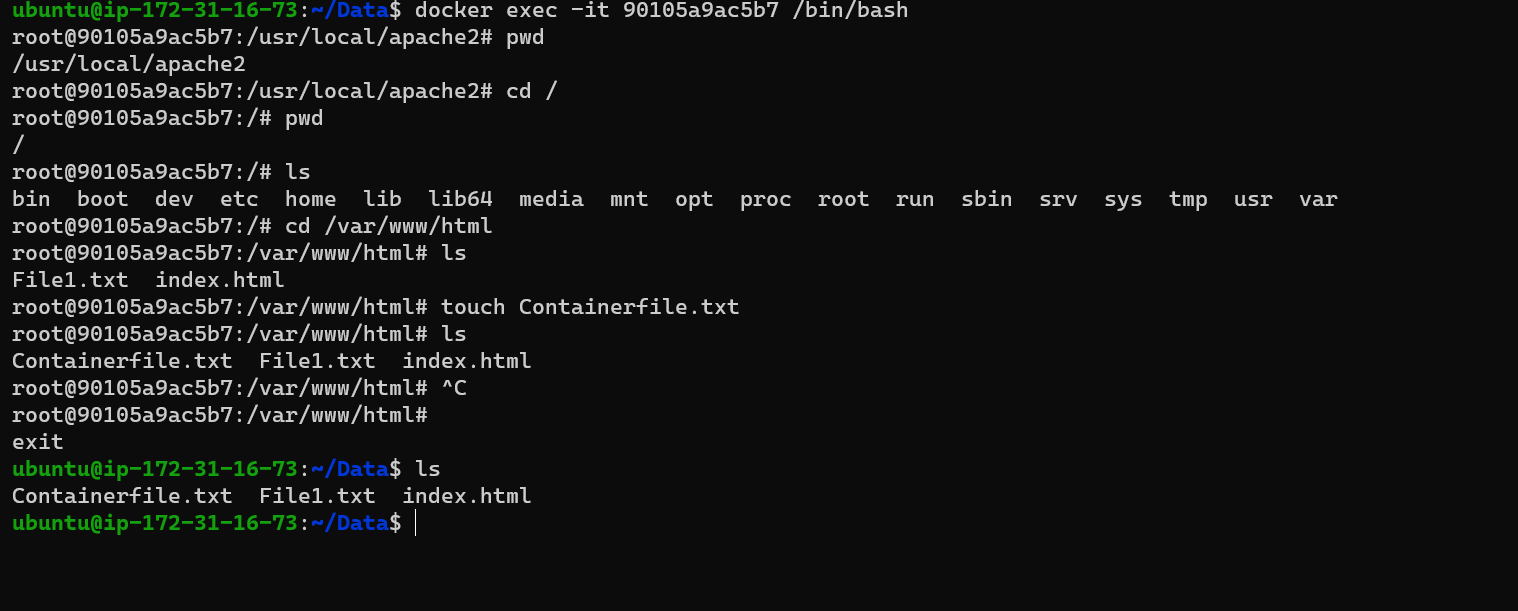
Example Docker Volume:
Here first we will create the docker volume and will attach this volume to a container.
Creating volume :
Creating a container with docker volume :
Here we will create the container with an Ubuntu OS image and attach the volume to the container.
docker run [-d/it] --name [container-name] -v/--volume [volume-name]:/[container-path] [image-name]
Using
docker inspect [container-name/id]command we can check container details.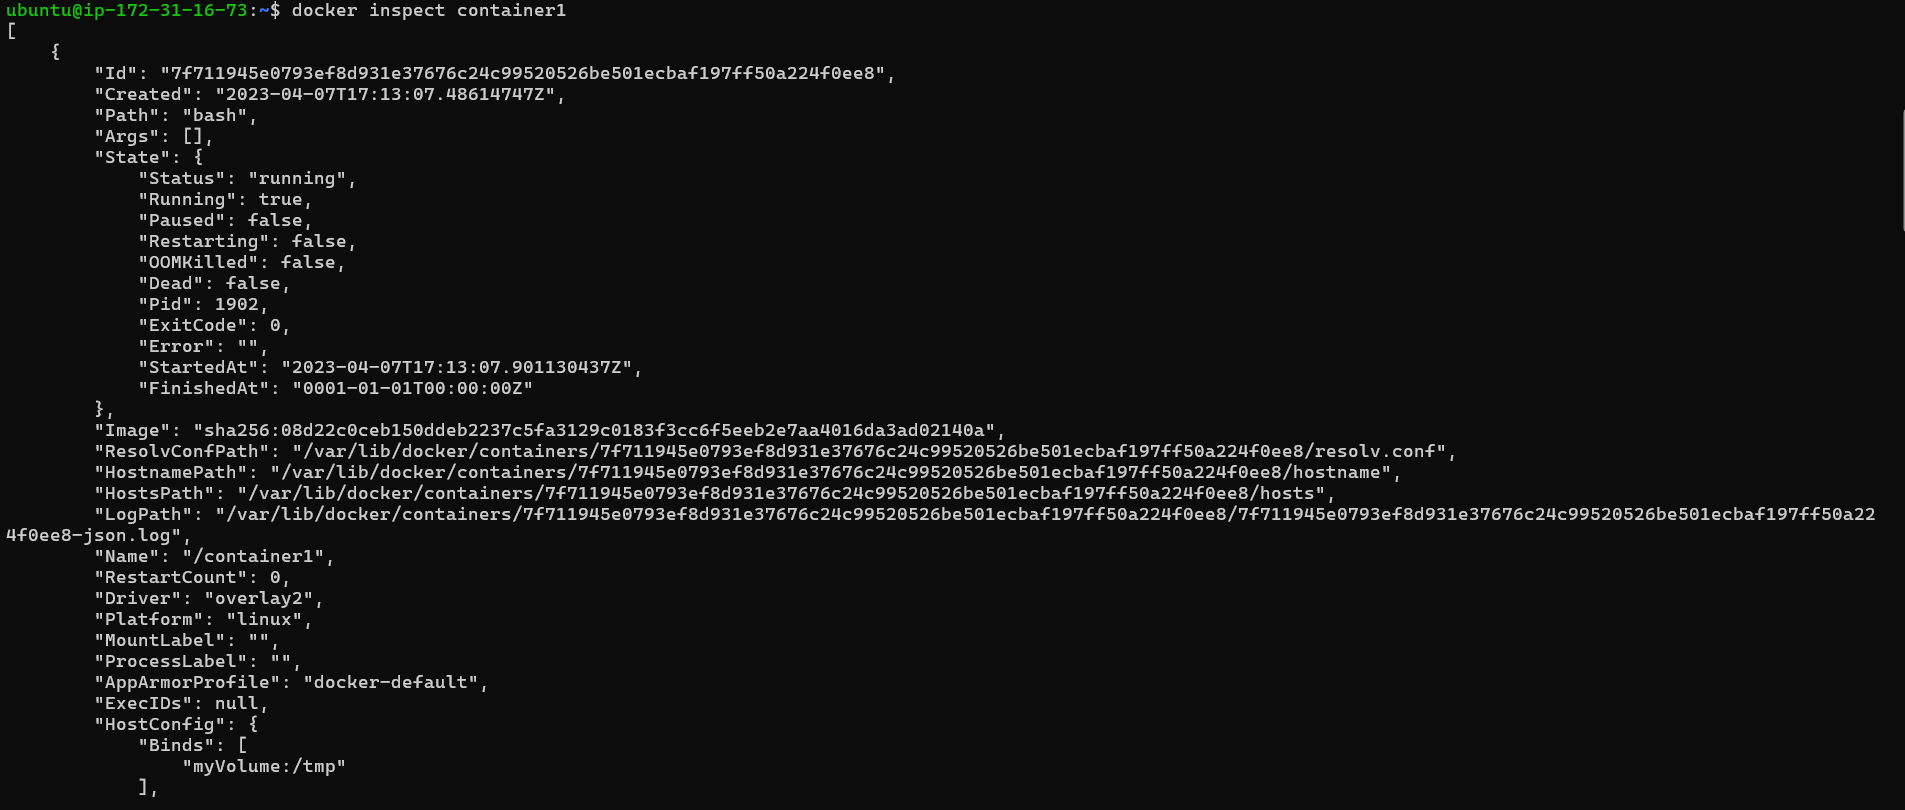

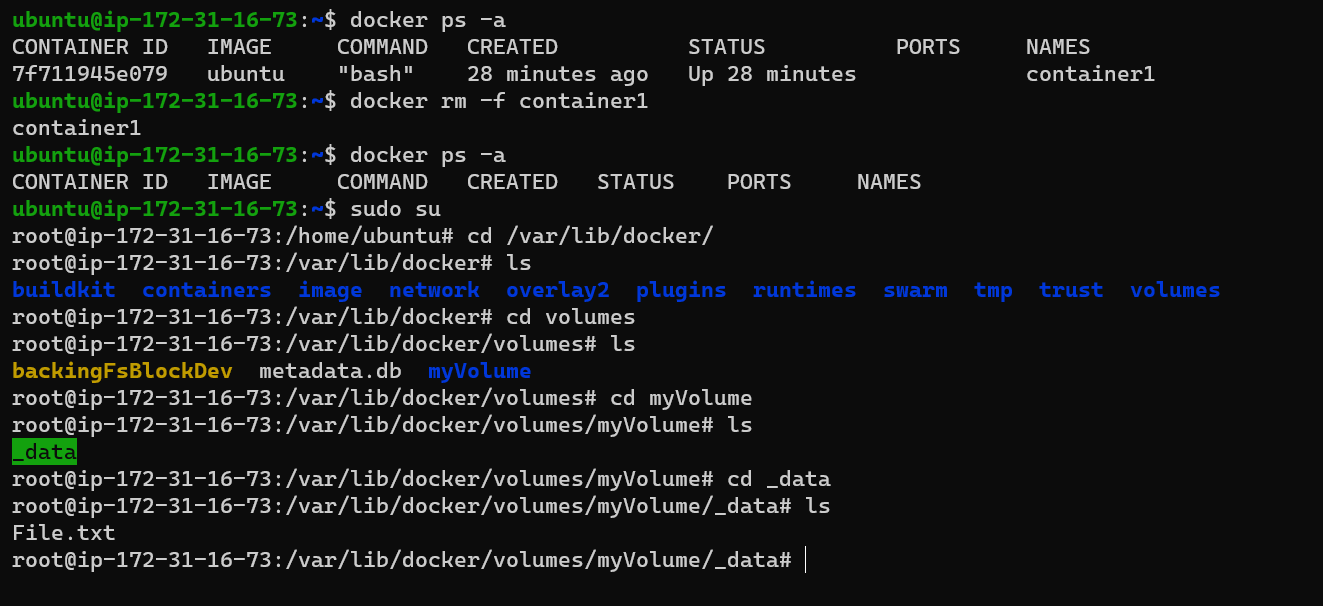
To check data/files that we created into the container are present in the docker volume. To check the docker volume data use the below commands.
First, get the root privilege access otherwise you will get permission-denied access
sudo su: To get root privilege access./var/lib/docker/volumes/[volume-name]/_data: Docker volume path.
Now, we will be deleting the container and check the data is persist in the docker volume even if the container is deleted.
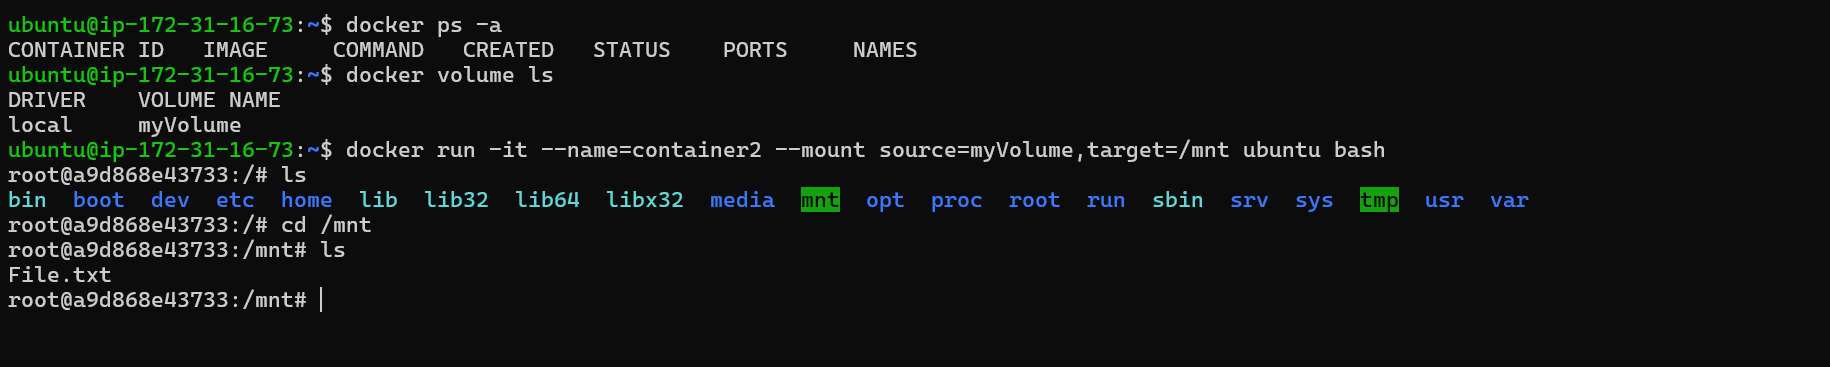
Mounting Data Volumes to Containers
The –mount option in Docker can be used for addressing an existing data volume to a specific part of the container filesystem. Although the result will be totally similar to the above command, it is more intuitive to many Linux developers.
docker run -d -it --name [container-name] --mount source=[volume-name],target=/[container-path] [image-name]
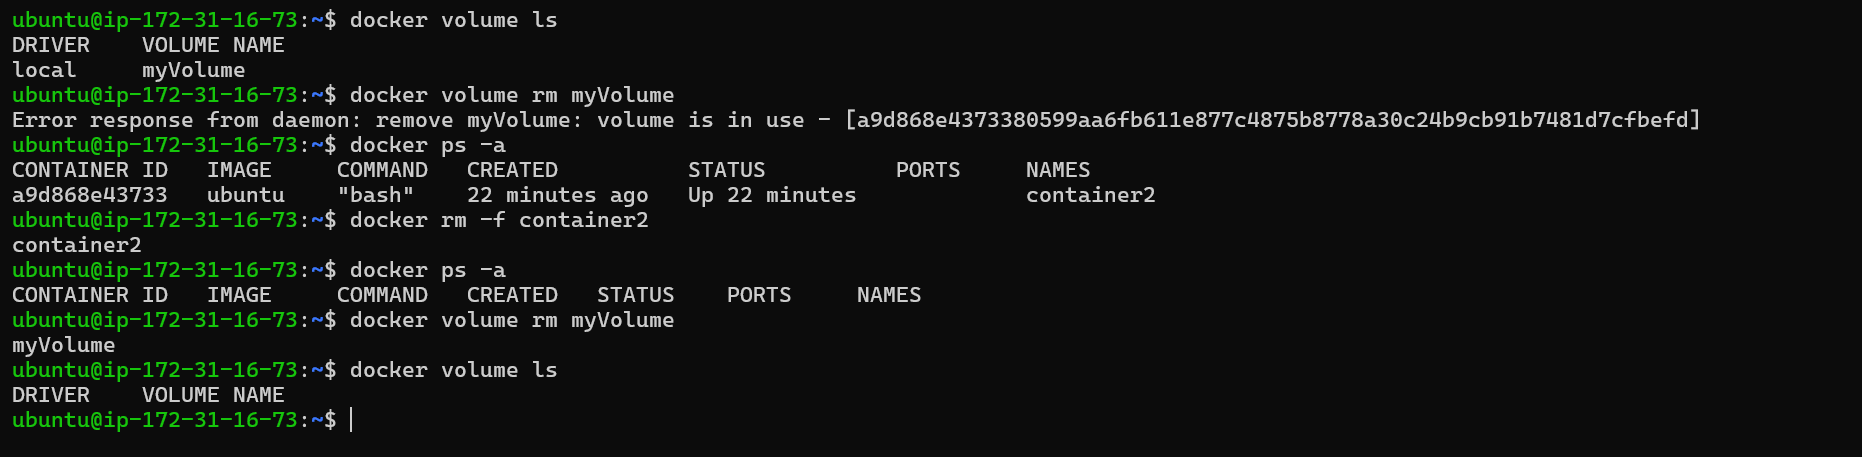
Now to remove the volume we have created using the below command
docker volume rm [volume-name]
You can remove multiple volumes by providing more than one volume name
docker volume rm [volume-1][volume-2]...
Thank you for reading the article.
Thanks for your valuable time.
Happy Learning !... Keep Learning ! 😊


